Review items
The review process includes reviewing and editing item content, leaving comments for the author or other reviewers, and returning or advancing items to the next stage in the item development cycle. As a reviewer, you will be evaluating new content to ensure that it meets any standards or requirementsstandards or requirements.
- Is mastery of the subject matter tested by the item essential for competent practice?
- Does the item address a specific content area as specified by the exam blueprint?
- Is the item appropriate for the certification-level practitioner?
- Can the correct answer be defended if necessary?
Open a review assignment
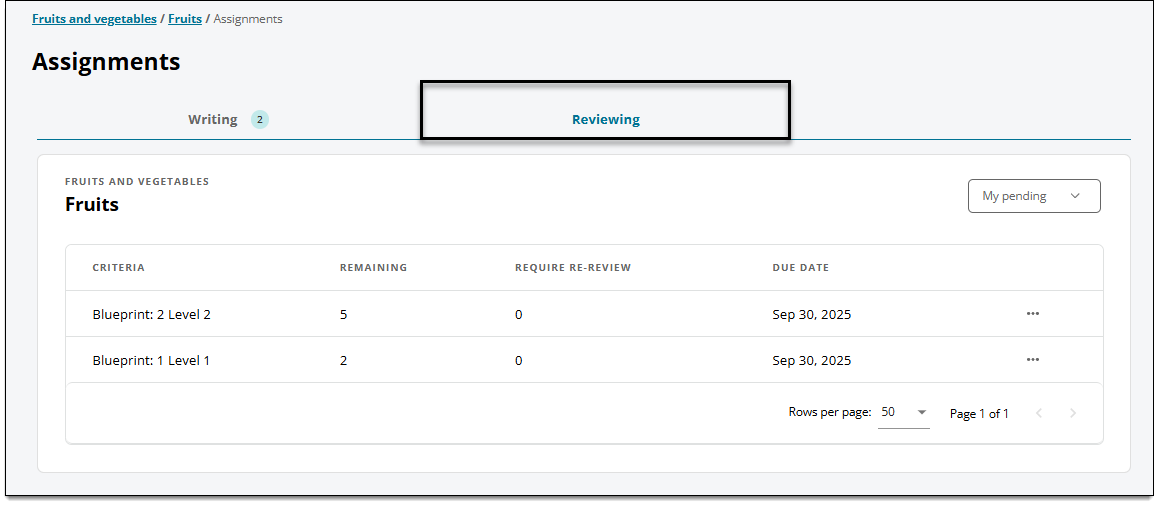
- On the Assignments page, click the Reviewing tab.
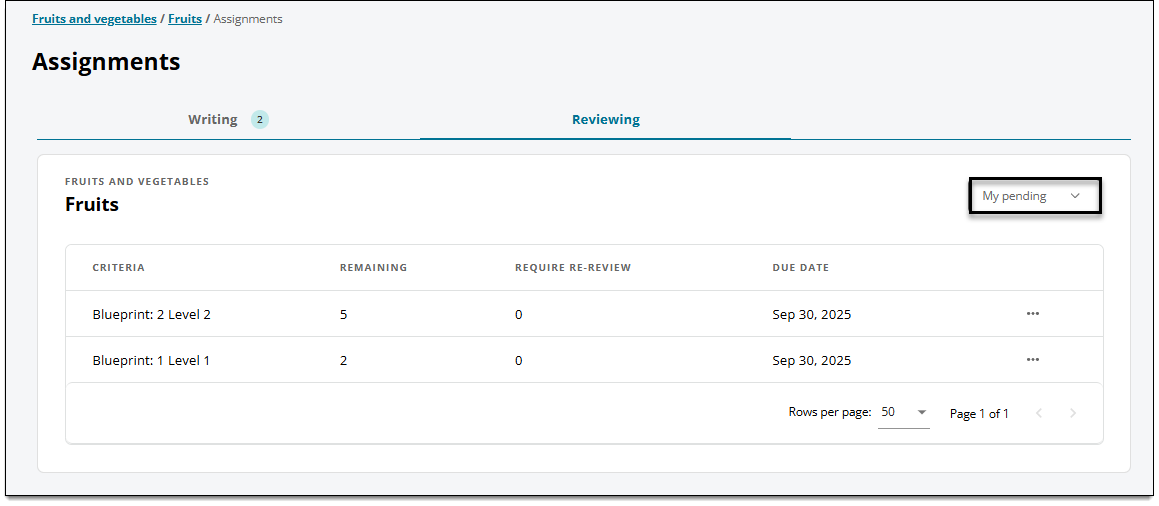
- You'll see a list of your review assignments for the project. The following details are shown for each assignment:
- Criteria: A group of items requiring review that are assigned to you. The name of the group is based on search criteria used by the project manager when creating review assignments.
- Remaining: The number of items you are assigned to review. This number is reduced by one each time you return or advance an item, and increases by one each time an author submits an item within your assigned review criteria.
- Require re-review: The number of items that were reviewed and advanced but have been sent through for another round of review. (This only applies when more than one reviewer is required for the item and re-review is assigned to a previous reviewer based on the configured review workflow.)
- Due Date: If a date is shown, you are expected to review all items in the assignment by this date. Some review assignments do not have due dates.
- Click the My pending drop-down menu and change it to All pending to view items that you worked on previously that are currently assigned to another reviewer.
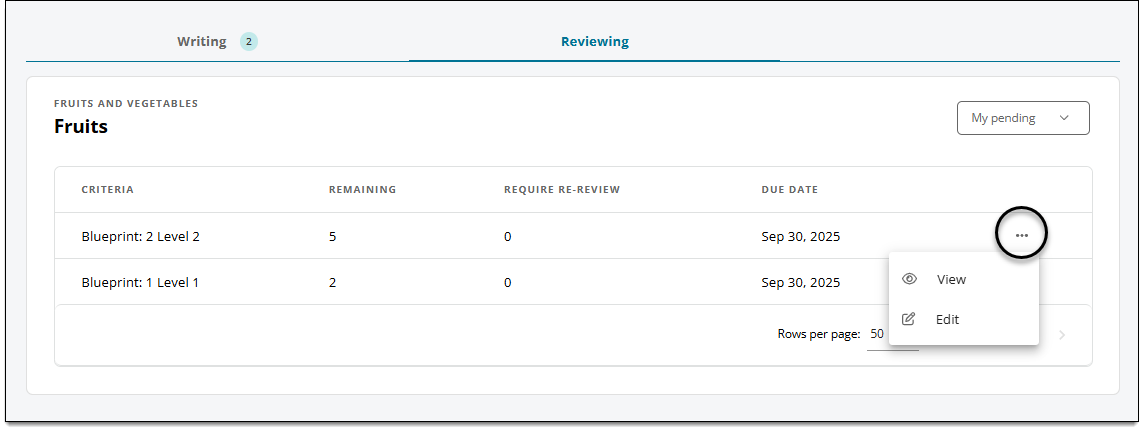
- Click the ellipsis button
 at the end of the desired assignment's row and select View or Edit.
- View: Opens all items in the assignment in View mode. (You will be able to open each item in Edit mode when viewing.)
- Edit: Opens all items in the assignment in Edit mode.
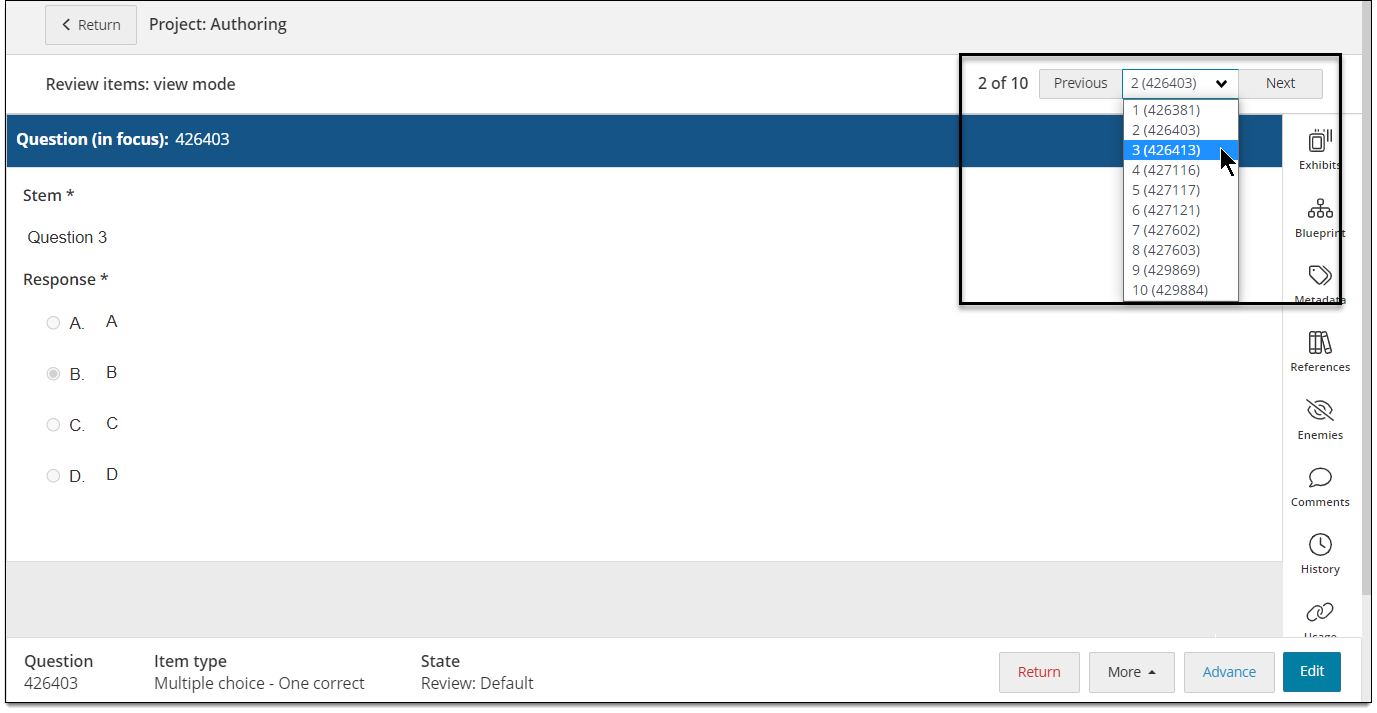
- The first item in the review assignment is displayed. Use the Next and Previous buttons in the upper-right corner of the page to view items. Or click the drop-down menu to find a specific item.
Show or hide answers (for project managers only)
|
|
When reviewing or examining/viewing items, the correct answer may be hidden by default. This feature is available if "key concealment" is enabled for the project. In ExamDeveloper, go to Manage > Settings > Configuration > Project. Select Yes for Enable Key Concealment for Project Managers.
- Open an item or batch of items to view or review (as described in the Open a review assignment section above).
- If the correct answer is hidden and you want to show it, turn on
 the Show answer toggle in the Question header to reveal it.
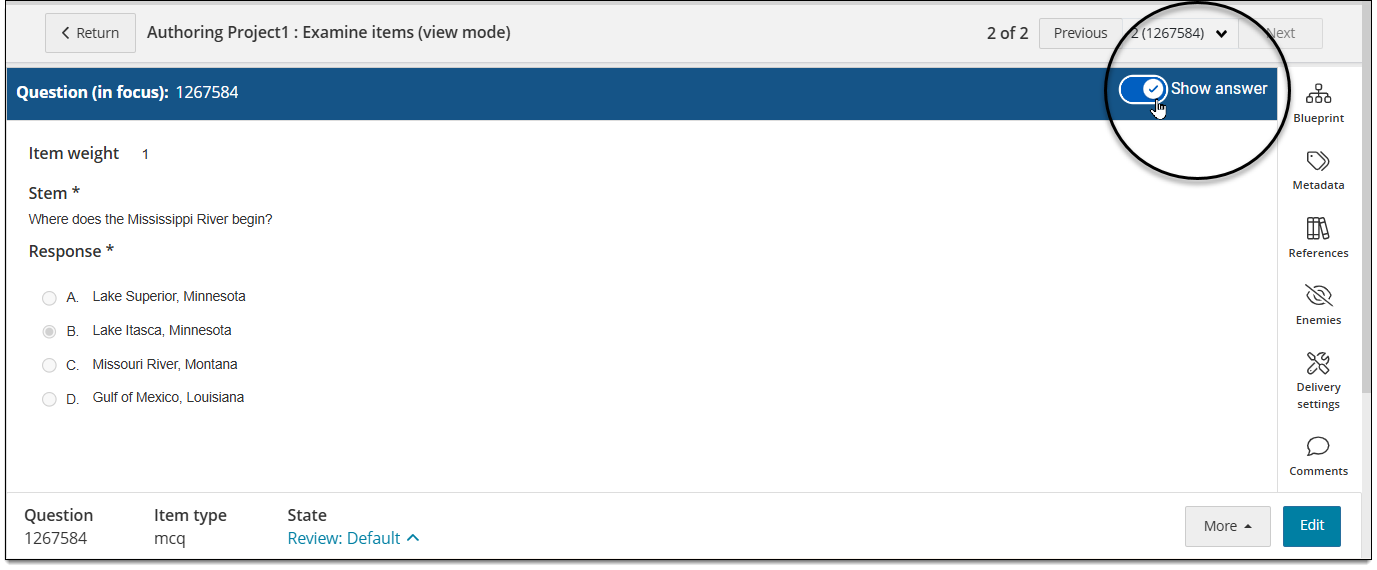
- Turn off
 the Show answer toggle to hide the answer.
 - The answer stays hidden by default when navigating between items. If you show the answer for one item, it will be hidden for the next item that you navigate to.
 If you enter Edit mode for an item, the answer will be shown. It will be hidden again when you return to view or review mode.
Edit item content or properties
If needed, you can directly make edits to an item's content or properties during review.
- When viewing the item, click Edit in the lower-right corner of the page.
- Make the desired changes to the item, such as:
- Modify the question stem and response options (see Author a new item for more information)
- Change the item type.
 You may lose content depending on the change you are making. Make sure to save content as needed before switching item types.
 - Add item enemies
- Assign the item to a blueprint area (or change the item's blueprint area)
- Add or edit metadata
- Add or edit images, media, or PDFs
- Add and format tables
- Insert equations
- Click Save in the lower-right corner of the page.
- Although the item history can be viewed by other authors and reviewers, you may still want to add a comment to note the changes that you made.
Edit exhibits
If the item has an exhibit, you can make changes to it if needed.
|
|
- Click the Set as focus button in the exhibit header. Then make the desired changes to the exhibit.
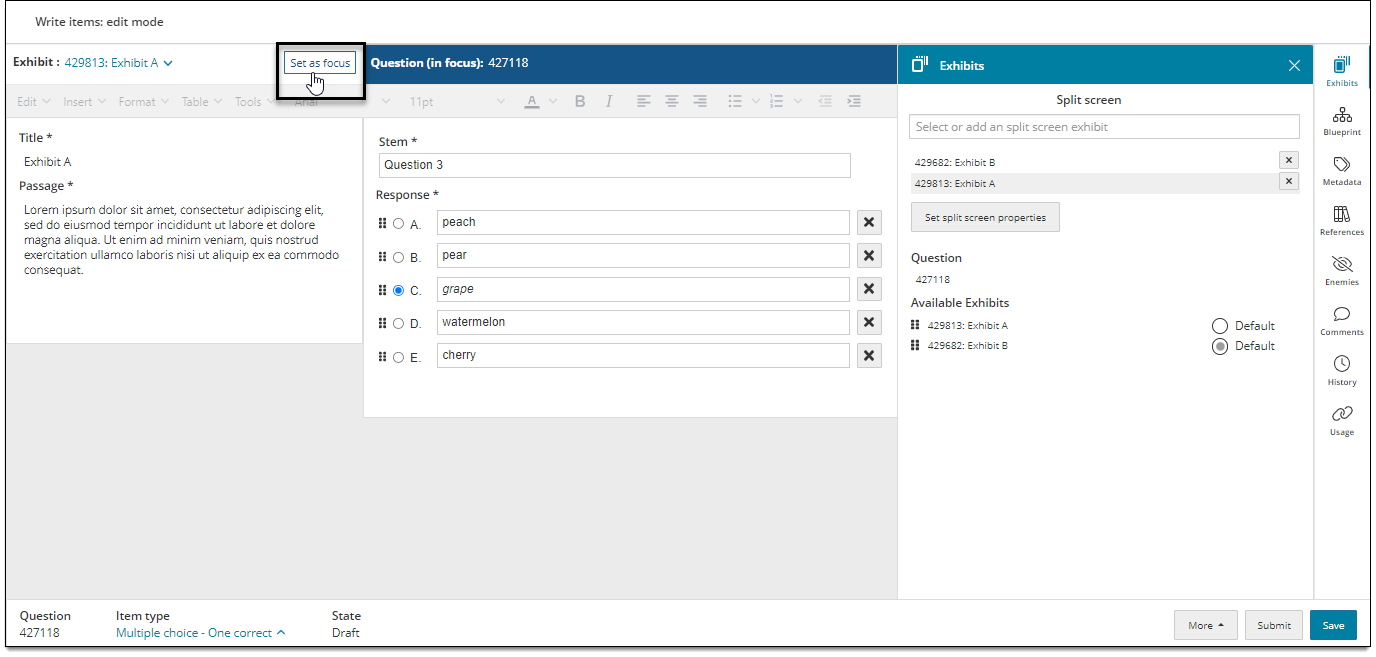
- Click Save in the lower-right corner of the page.
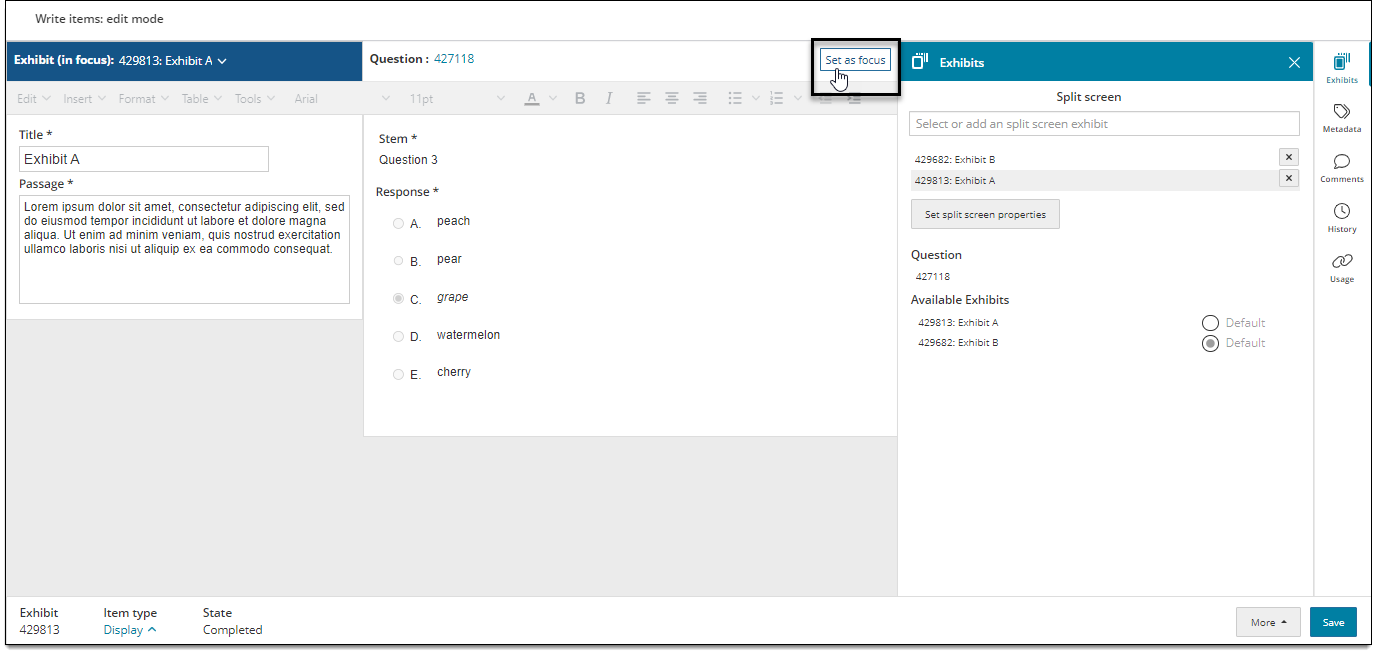
- Remember to set the item back in focus if you need to continue editing the item content or properties. (Click the Set as focus button in the item header
 ).
).
Exhibits that are still in Draft mode can also be edited separately from a question item. Click the exhibit item ID from your Draft/Returned questions list. (If you created an exhibit when writing an item, and saved the item as a draft, the exhibit is saved as a separate item until the exhibit has been advanced by a reviewer.)
View item history (previous revisions)
View a list of each revision showing who edited or reviewed the item and the date/time the action took place.
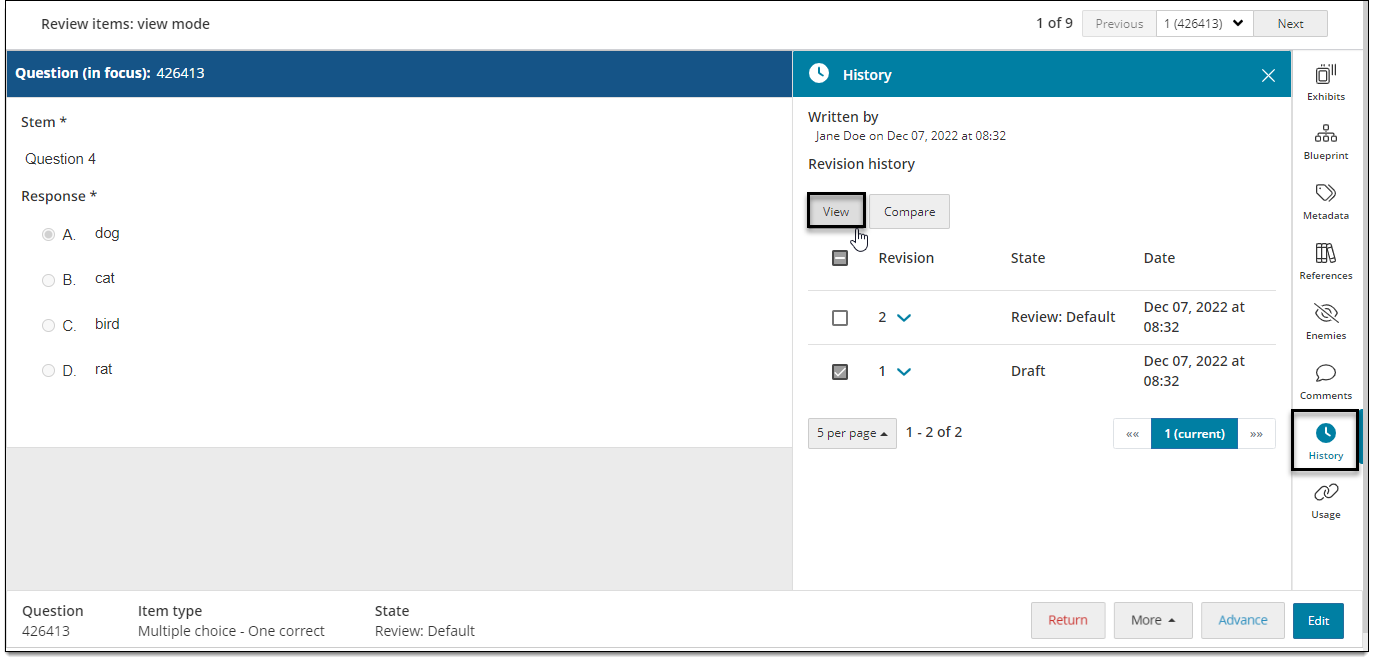
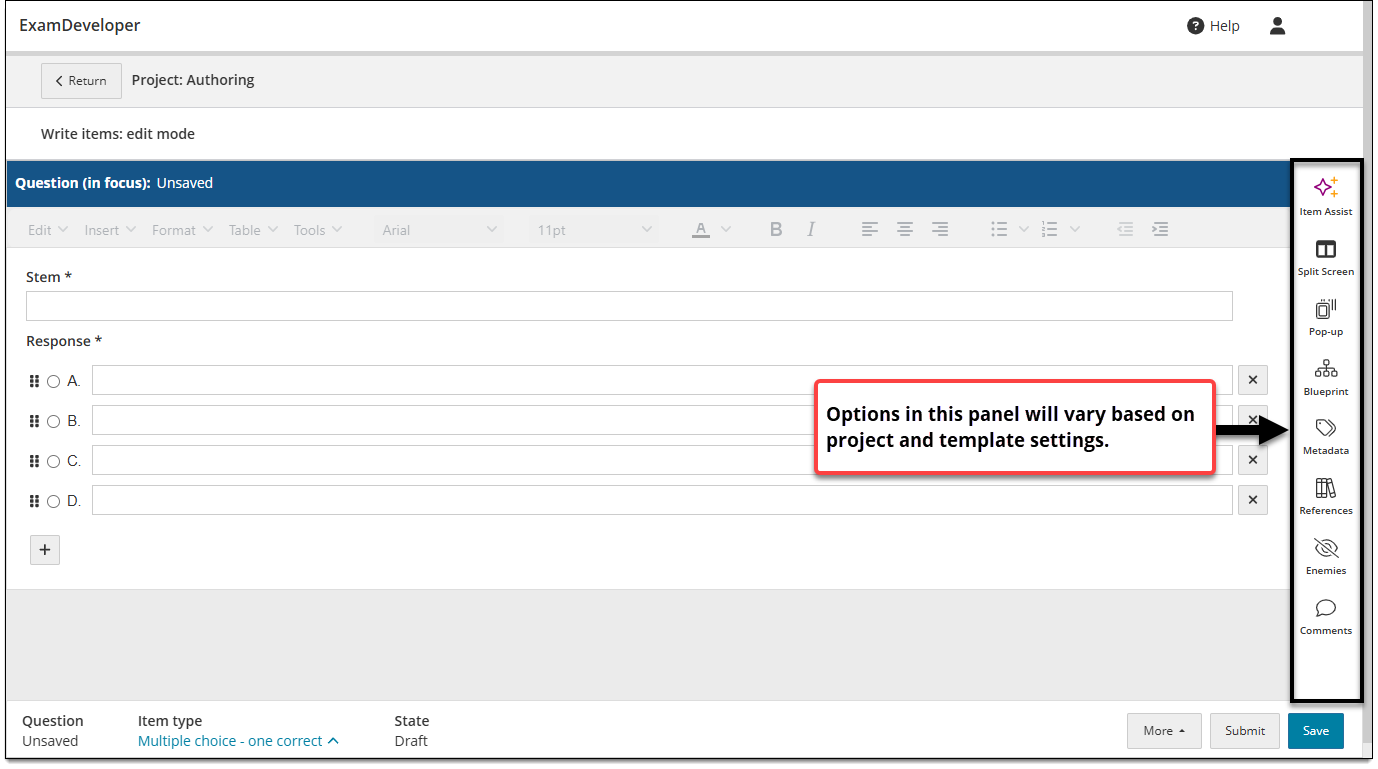
- In the item settings panel , click History.
- Click the Revision number to display the details.
- A new revision number is created each time you save or submit an item.
- Revisions generated using Item Assist will be marked with a sparkle icon
 .
.
- Select the check box for the revision and click View. The previous version of the item is displayed.
- Click Exit history in the lower-right corner to return to the current item revision.
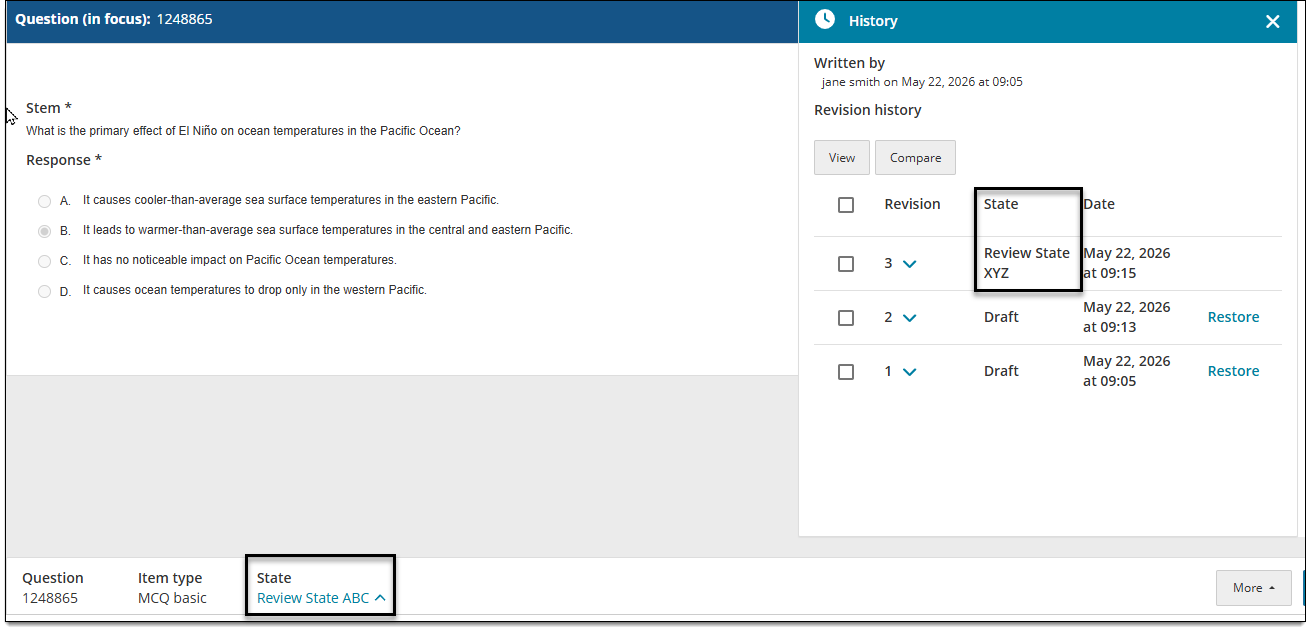
The item's state in the bottom toolbar may not match its state in the History panel. This could occur when you share an editable item that is currently in a review state from one project to another. In this case, the shared item will inherit the first review state of the project you shared it to, as shown in the bottom toolbar. In the item's history, the last saved revision will show the state at the time of that revision.
Compare item revisions
Select two or more revisions to compare.
- In the item settings panel , click History.
- Select the check box for two or more revisions and click Compare. (If you don't see the Compare option, navigate to the next or previous item and back to the item again.)
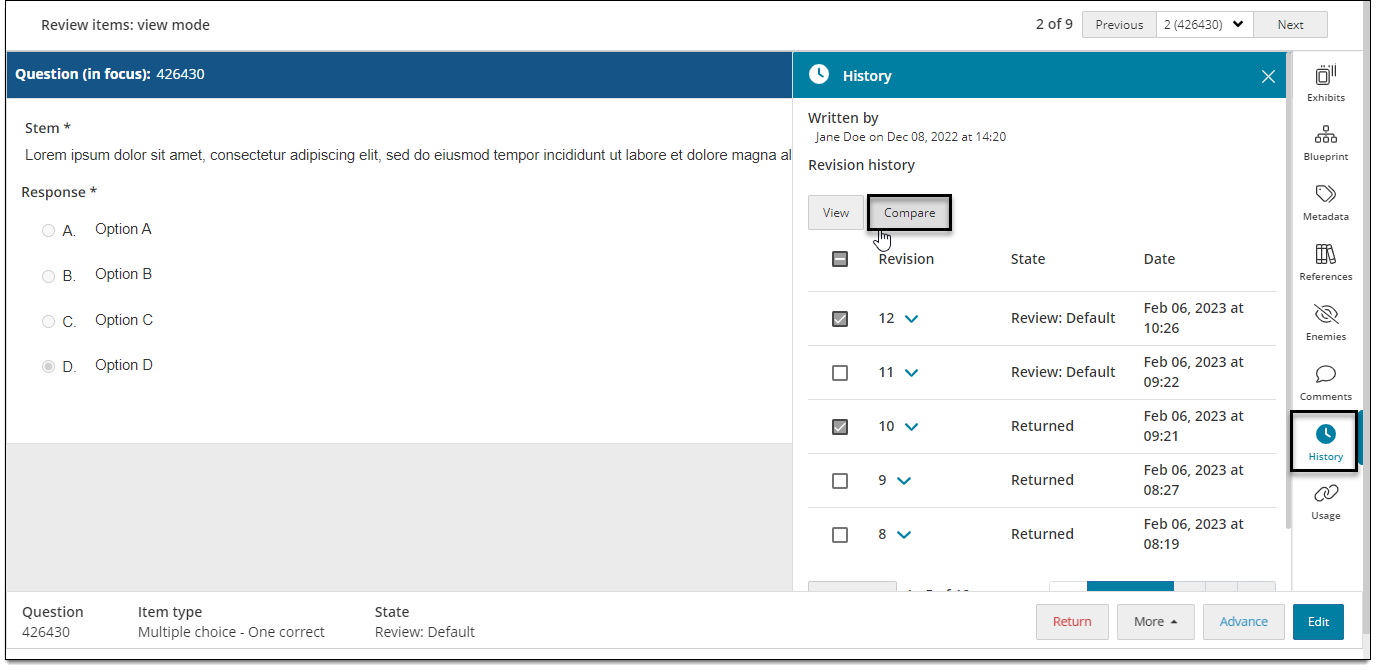
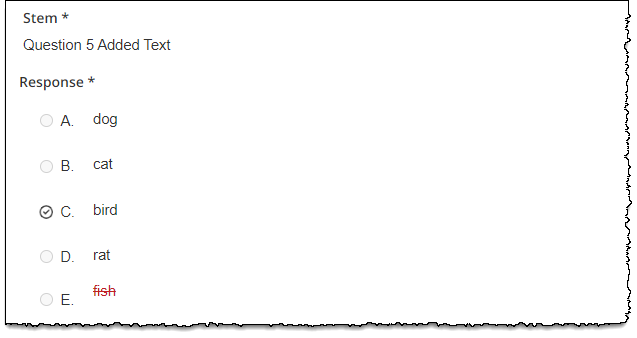
- The newer version of the item is displayed with visible edits from the older version.
- If you selected three or more revisions to compare, use the drop-down menu above the History panel to choose a different pair of revisions to review (e.g., Revision 1 and Revision 3 instead of Revision 1 and Revision 2). You cannot view more than two revisions at a time.
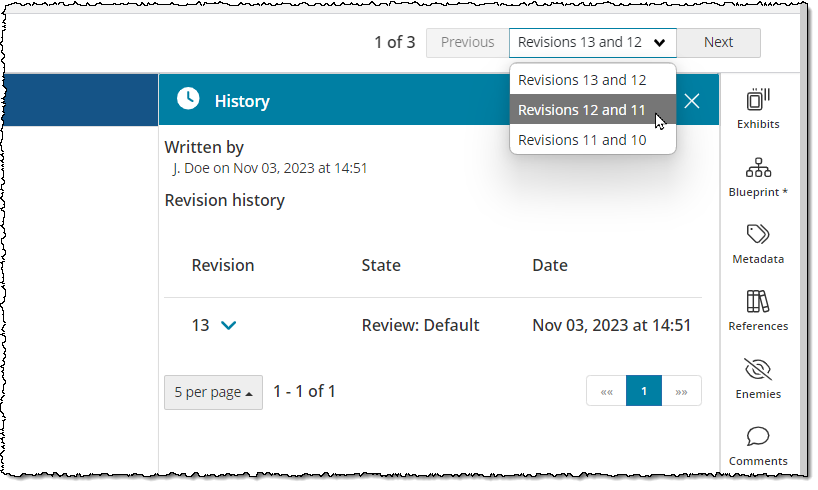
- Click Exit comparison in the lower-right corner of the page to return to the current item revision.
Types of edits shown in revision comparisons
|
|
- Removed text: the text was removed or deleted from the earlier version. For example, part of the distractor was replaced with a different word or phrase, or the entire distractor was removed.This will show up as strikethrough text.
- Added text: the text was added in the newer version. For example, a word or phrase was added to the stem, or an entire distractor was added. This will show up as lighter grey-colored text.
- Changed order of response options: for example, Option A and B switched places. These changes will show up as a combination of removed and added text.
- Changed correct response(s): a checkmark is shown inside the response option bubble of the new/most recently indicated correct response. For example, if the checkmark shows inside option D, this means the correct response was changed from another option to option D.
Add or review comments
Note: comments added in the Comments panel are available to both authors and reviewers. A separate commenting feature is available for reviewers only when returning items to the author (if configured by the project manager). See the Return an item section below.
Comments are used for internal communication between item authors and reviewers (this feature is NOT related to comments that can be entered by candidates during exam delivery).
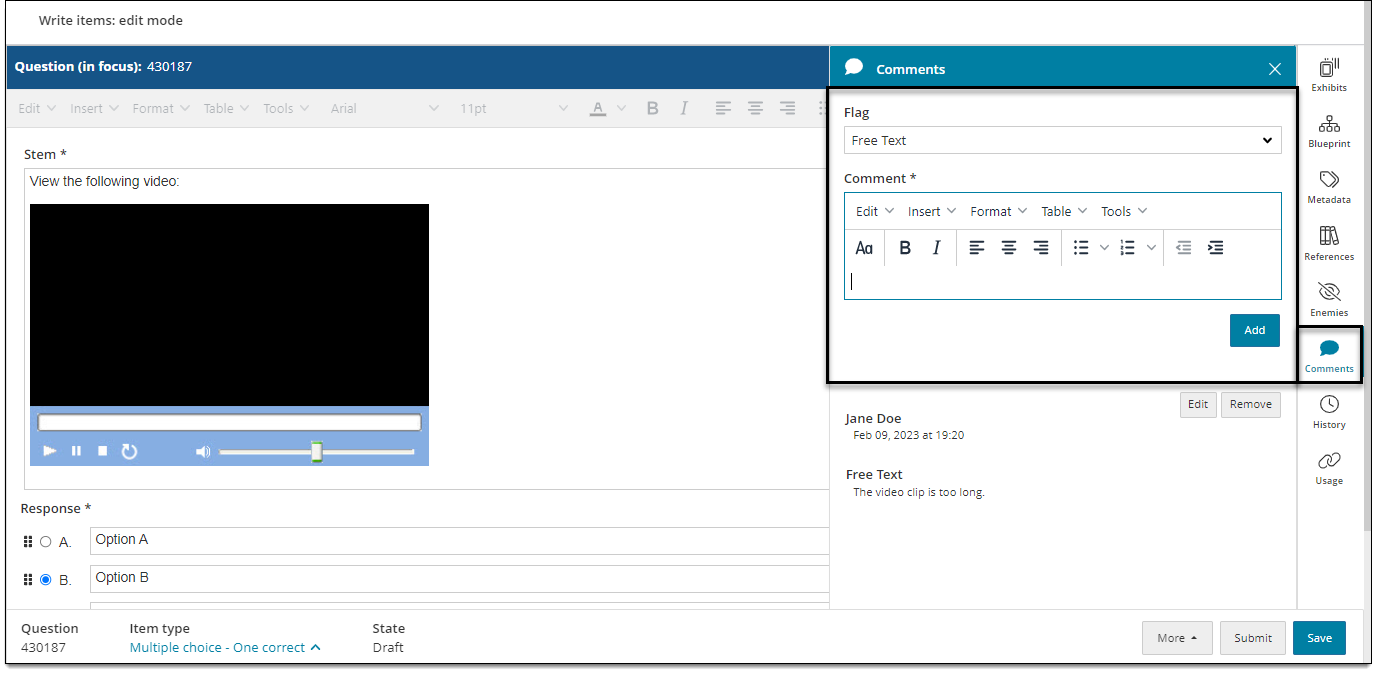
- In the item settings panel , click Comments.
- To enter a new comment, choose a type from the Flag drop-down menu. This flags the comment by subject, issue, or category. Flags are configured by the item bank manager.
- Enter comments in the Comment text field. If desired, you can apply basic formatting to the text or insert assets, tables, and equations.
- Click Add.
You can view older comments left by other authors or reviewers beneath newly added comments.
Preview an item
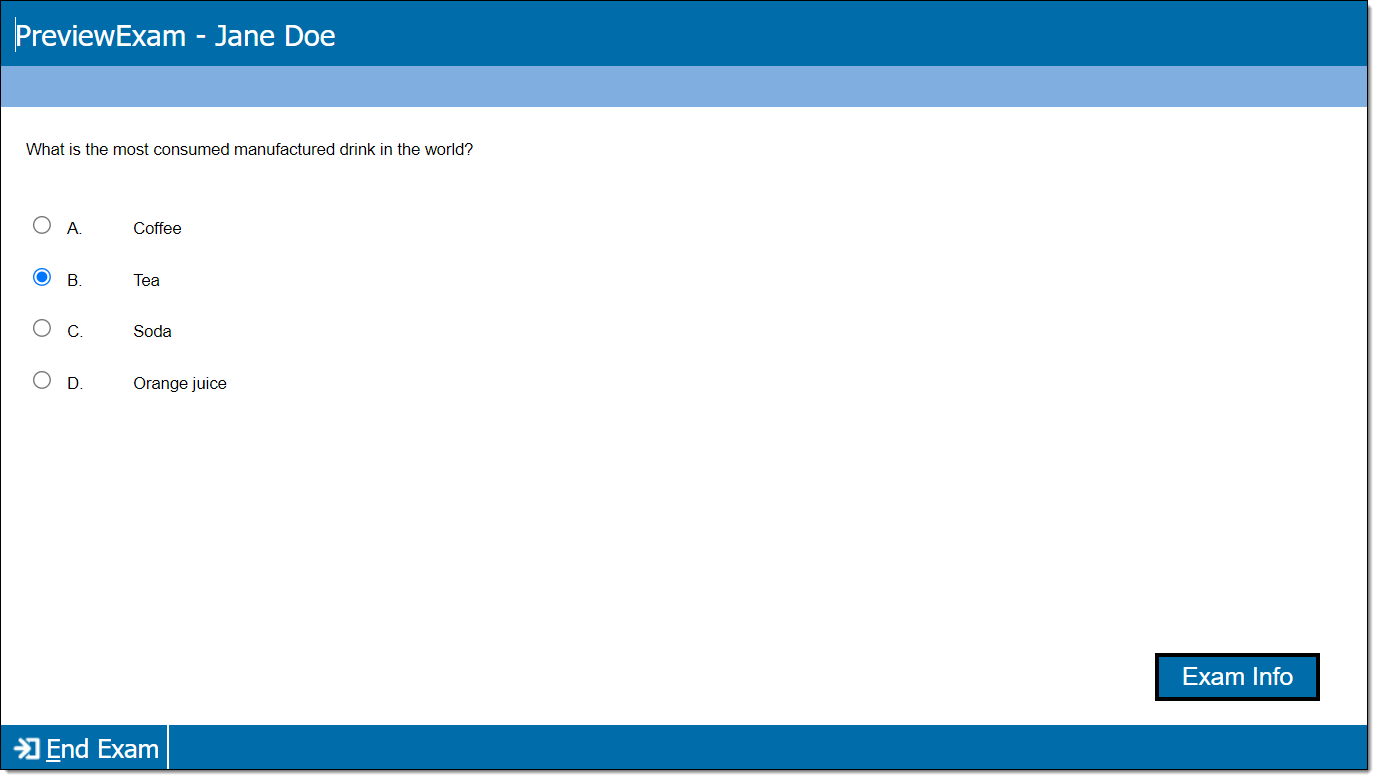
Preview the item using a sample browser-based test driver (Exam Preview). This shows how the item will appear to candidates during exam delivery.
|
|
- In the lower-right corner of the page, click Save . (You must save the item before previewing it.)
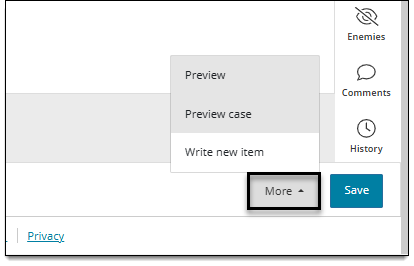
- Click More > Preview.
- The item preview will launch in a new tab or window in your browser.
Advance an item
If you completed review and determined that the item meets the requirements, you can advance it to the next stage in the review workflow.
- Make sure any additional requirements have been fulfilled for the item (assign the item to the correct blueprint level, add metadata, add references, etc.)
- Click Advance in the lower-right corner of the page.
- In the Advance modal, enter a comment if needed and click Submit. Comments may or may not be required, depending on the project settings.
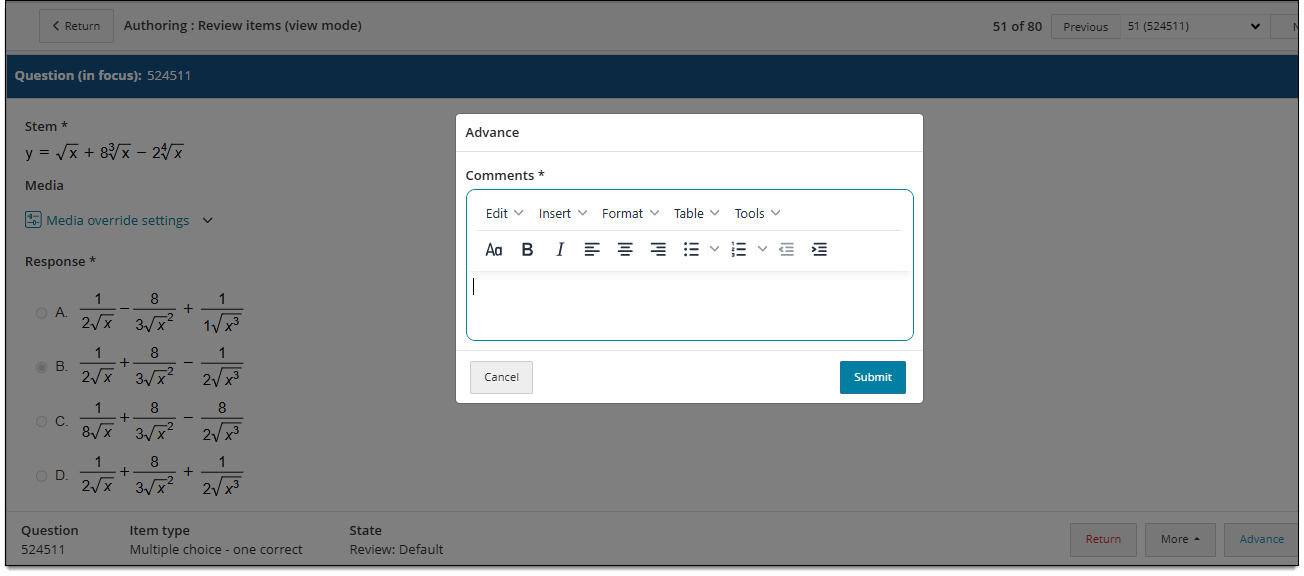
- You may also need to select an Outcome such as "Send to Original Author". If only one reviewer is required and/or you are not allowed to choose the next step, the outcome (e.g., "Send to Original Author") is displayed as read-only and no selection is required.
- You can also add comments before returning the item. See Add or review comments above for more information.
- Click Submit.
- The item is advanced to the next stage in the workflow. (This may be "Complete" or the next review stage.)
Return an item
If you determine that the item needs further editing, you can return it to the author. This sends the item back to the author for editing. (It will show up in the author's Returned queue on their dashboard.)
- Click Return in the lower-right corner of the page.
- In the Return modal, enter a comment such as a brief summary of why the item is being returned. Your comment can be viewed by the author in the Comments panel.
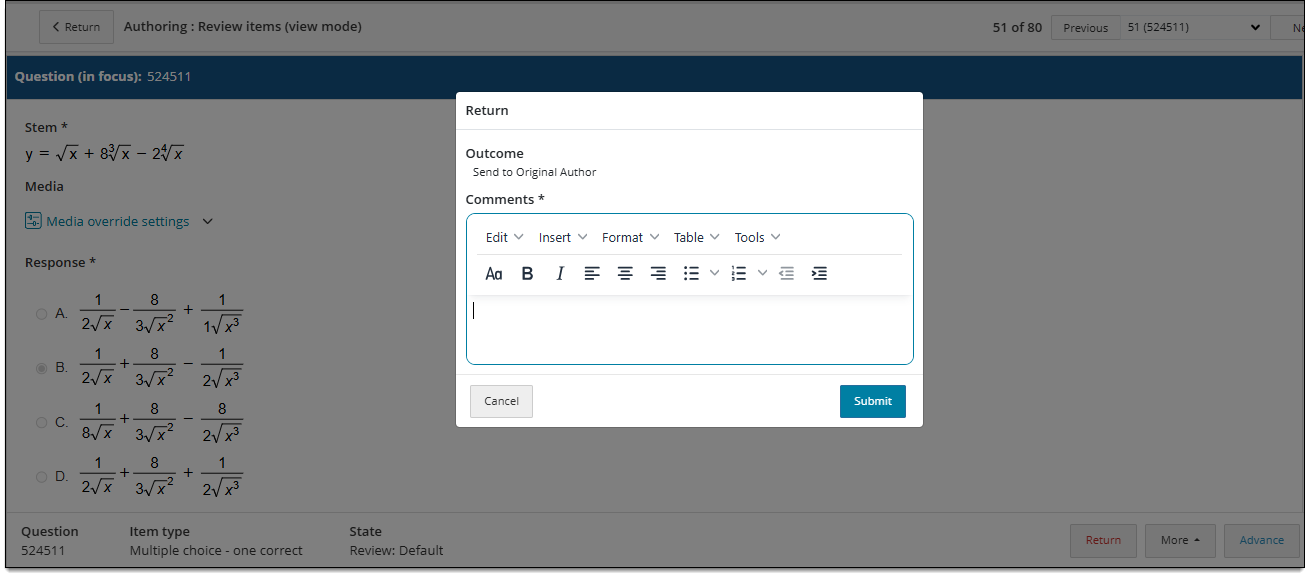
- You may also need to select an Outcome such as "Send to Next Reviewer". If only one reviewer is required and/or you are not allowed to choose the next step, the outcome (e.g., "Send to Next Reviewer") is displayed as read-only and no selection is required.
- You can also add comments before returning the item. See Add or review comments above for more information.
- Click Submit.
- Once the author edits and resubmits the item, the item may be reassigned to you for review depending on your organization's review process.