Add and format tables
Add tables to the question stem, response options, or exhibits.
Add or delete a table
Add a table
- Click inside the Stem text field or one of the response option text fields.
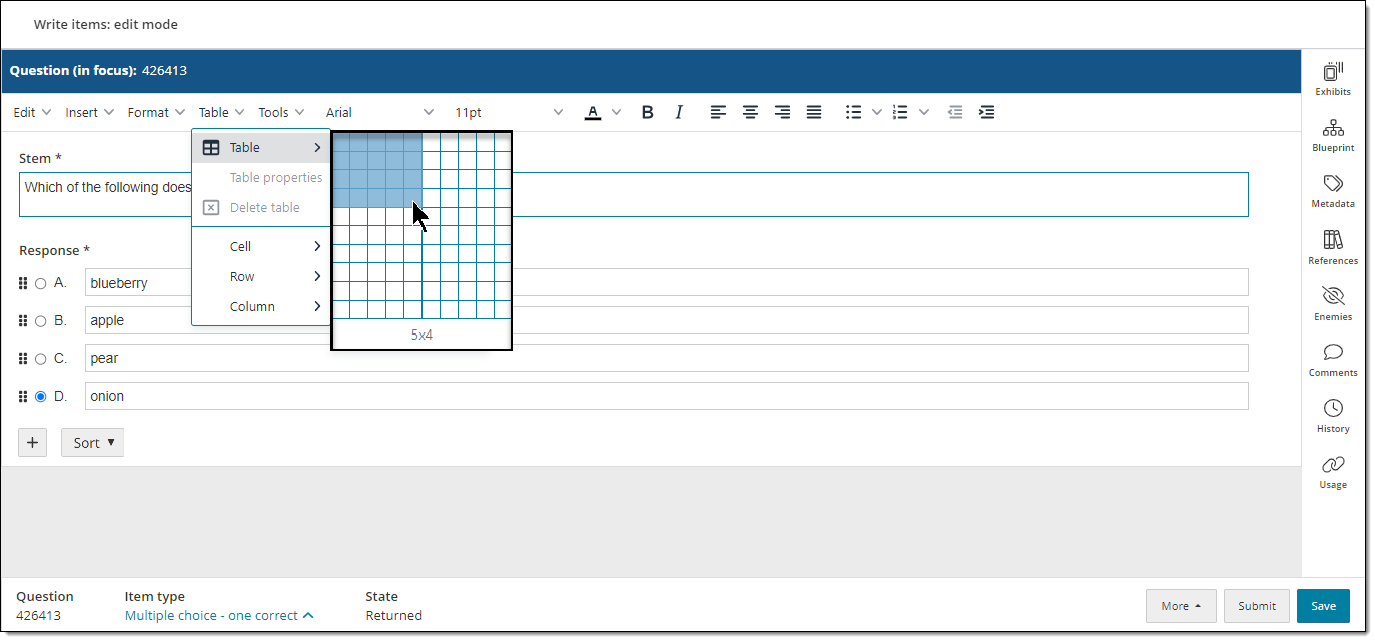
- In the editing toolbar, go to Table > Table and hover over the area that includes the number of rows and columns you want to start with.
- Click inside the highlighted area to add the table.
- Click Save in the lower-right corner of the page.
Delete a table
- Right-click anywhere inside the table and select Delete table.
Add or delete rows and columns
Add rows and columns
- Right-click inside a row in the table and select Row > Insert Row Before or Insert Row After. Or click the Insert Row options in the table shortcut menu
 .
.
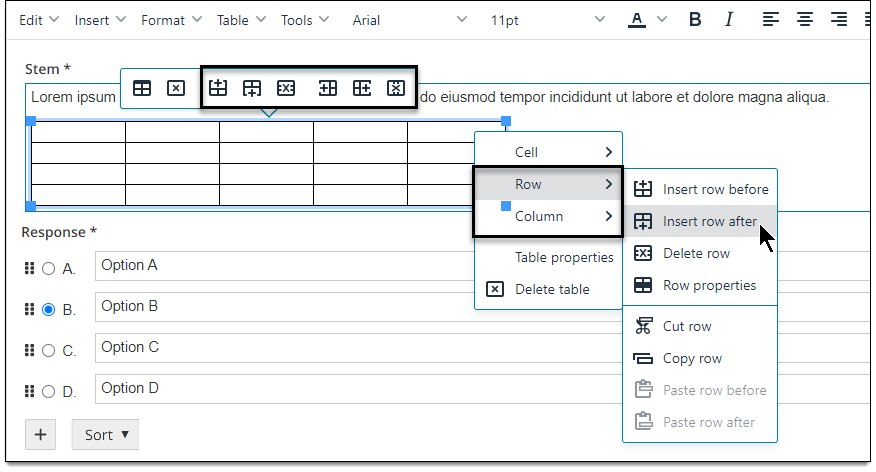
- Right-click inside a column in the table and select Column > Insert Column Before (adds column to the left) or Insert Column After (adds column to the right). Or click the Insert Column options in the table shortcut menu .
Delete rows and columns
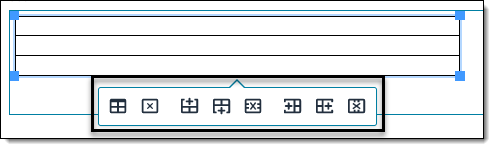
- Right click inside the row you want to remove and select Delete row. (Or click the Delete Row option in the table shortcut menu .)
- Right click inside the column you want to remove and select Delete column. (Or click the Delete Column option in the table shortcut menu .)
Change table, column, or row size
Change table width
Changing the total table width will automatically distribute all columns evenly, unless a single column is manually set to a different width. (See Change column width below for details.)
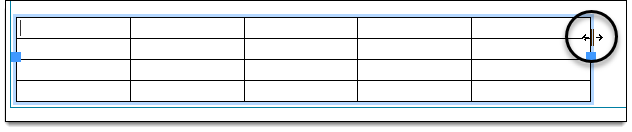
- By default, table width is set to 475px. To increase or decrease the entire table width, do one of the following:
- Click and drag: Click and drag the far-right edge of the table to the desired width.
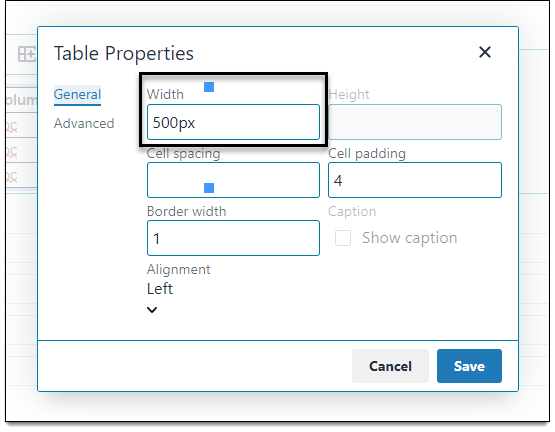
- Enter width in pixels: Right-click inside any cell and select Table properties. In the Width field, enter the desired width for the entire table in pixels (e.g., "500px"). Then click Save.
- Click and drag: Click and drag the far-right edge of the table to the desired width.
Change column width
- To change the width of an individual column, do one of the following:
- Click and drag the far-right edge of the desired column to the desired width.
- Right-click inside the column and select Cell > Cell Properties. In the Width field, enter the desired width for the column in pixels, for example, "500px". (Changing the width of a cell changes the width of the entire column.)
- If you're changing the width of the last (far-right) column, you must enter a width manually in the Cell Properties. Clicking and dragging the far-right column adjusts the width of the entire table.
Change row height (all rows)
- To change the height of all rows, right-click inside any cell and select Table properties. In the Cell Padding field.
- Enter a value such as "1" or "6".
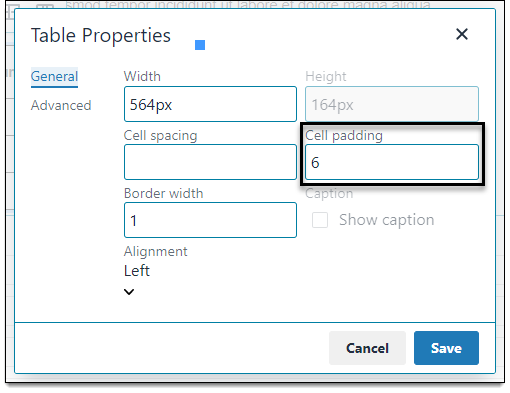
- Click Save. This will increase (or decrease) the space between the text and the border of all cells.
Change row height (all rows)
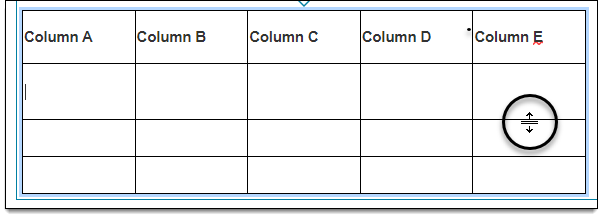
- To change the height of an individual row, click and drag the bottom of the row up or down to adjust the height.
Change border width or background color
Change outside table border width
- To change the width of the outside border (the border around the perimeter of the entire table), right-click inside any cell and select Table properties.
- In the Border width field, enter the desired width for the border.
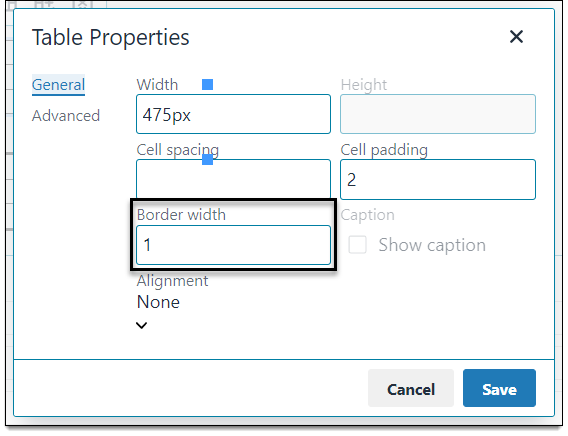
- Click Save.
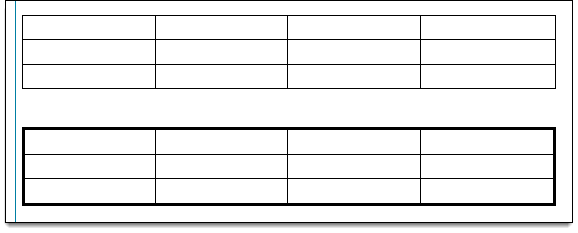
- The default border width is "1"; the example below shows a table with the default border and a table with a border setting of "3":
Remove table borders
- To remove all table borders, right-click inside any cell and select Table properties.
- In the Border width field, remove the value or enter "0". Then click Save.
Change background color or a cell, row, or column
- Highlight the entire row or column or click inside an individual cell.
- Right-click and go to Cell > Cell properties and click the Advanced link on the left side of the window.
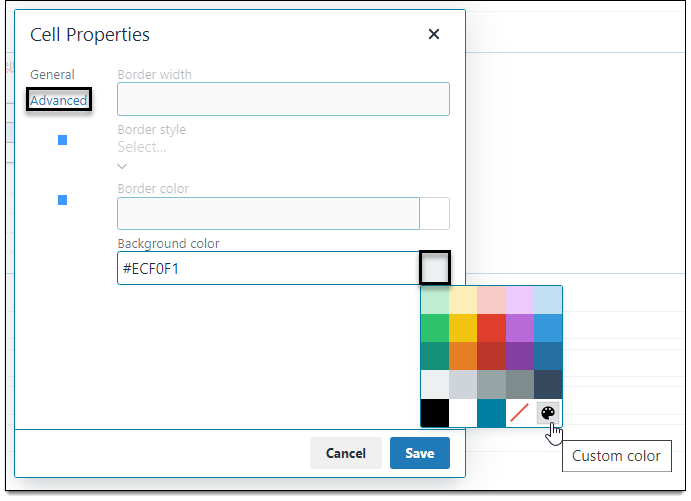
- In the Background color field, enter a hex color number (such as #000000) or click the color picker to select a predefined color or enter a custom color. The custom color option allows you to enter RGB values in addition to hex values.
- Click Save.
Change table background color
To change the background color of the entire table:
- Right-click anywhere in the table and select Table properties.
- Click the Advanced link on the left side of the window.
- In the Background color field, enter a hex color number (such as #000000) or click the color picker to select a predefined color or enter a custom color. The custom color option allows you to enter RGB values in addition to hex values.
Remove background color
- Highlight the row or column or click inside the cell.
- Right-click and go to Cell > Cell properties and click the Advanced link on the left side of the window.
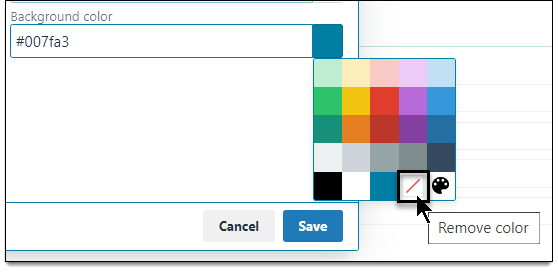
- Click the color picker and select the Remove color option.
Changing border colors
You cannot change the color of borders. You can only change border width or remove the borders.
Format text
Use the editing toolbar
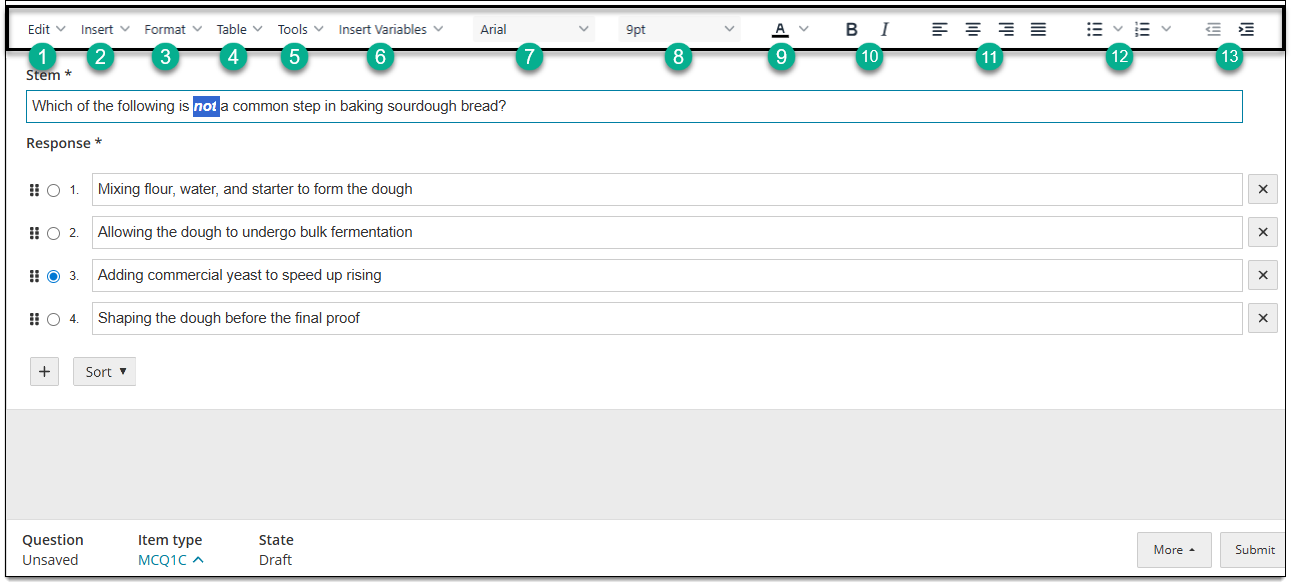
The following formatting and editing options are available in the editing toolbar. All changes are visible to the candidate during exam delivery.
- Edit menu: undo, redo, cut, copy, or select text.
- Insert menu: insert images, PDFs, media, equations, or special characters.
- Format menu: apply basic formatting styles (such as bold or italic text) and heading styles (Heading 1, Heading 2, etc.), or clear all formatting from selected text.
- Table menu: add tables.
- Tools menu: additional options including Find and replace, Word count, and Source code (opens the HTML for the selected content area and make changes to the source code instead of using the text editor). Note: Spell check is available within text fields by right-clicking a red-underlined word to display alternate spelling suggestions.
- Insert variables: (if configured for your project) add variables within text in the item content (the question or response options).
- Font: change the font style (e.g., Times New Roman, Arial, etc.) - the default style is set by the item bank manager.
- Font size: change the size of the text - the default size is set by the item bank manager.
- Text color: change the color of the text.
- Bold and italic formatting: style the text as bold, italic, or bold and italic.
- Alignment: align the selected text to the left side, right side, or center, or space the text evenly across the width of the page.
- List styles: create an ordered list denoted by letter or number, or an unordered list denoted by bullet points.
- Decrease or increase indent: removes or adds horizontal space at the beginning of a text line; or for lists, this option nests the bullet point or numbered line to the next higher (decrease indent) or lower (increase indent) level of the hierarchy.
Use the spell checker
Words identified as misspelled will be underlined in red.
- Right-click a red-underlined word to display the spell checker options.
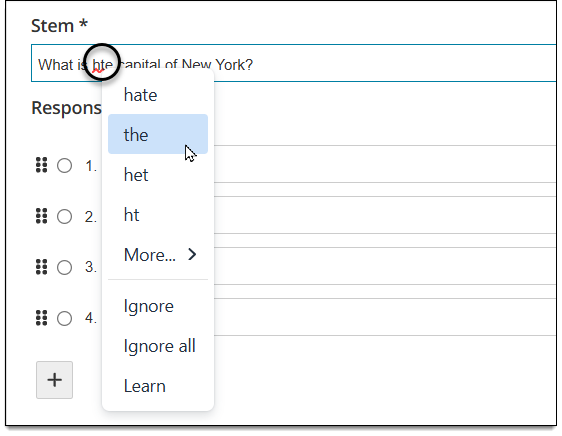
- Select one of the suggested spellings or other options:
- More displays additional suggestions.
- Ignore removes the red underline for that instance of the spelling, but will still identify other instances of the same spelling.
- Ignore all removes the red underline for all instances of that spelling.
- Learn adds the spelling as a word in the project's dictionary so that it is no longer triggered as misspelled by the spell checker.
Set a header row
- Click inside a cell within the desired row.
- Right-click and go to Row > Row properties.
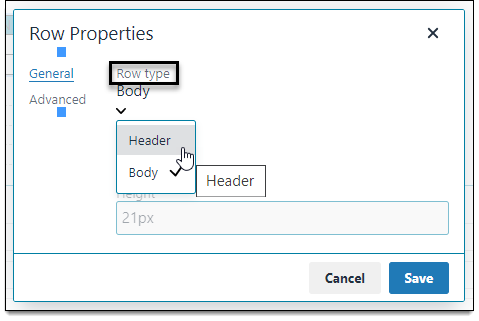
- Click the Row type drop-down menu and select Header.