Add images
Images can be added to item content including the question and response options (depending on the item type). They can also be added to exhibits.
 You can upload new images when editing the item. Uploaded images will also be added to the project's asset library and can be added to other items in the project.
- You can also attach images to comments or metadata types that allow text entry.
- You can download images attached to an item.
Add images to an item
Add images to the item's stem or passage area (inside a 'content component' with a text box).
|
|
- Click inside the Stem, Response, or Passage.
- In the editing toolbar, go to Insert > Assets.
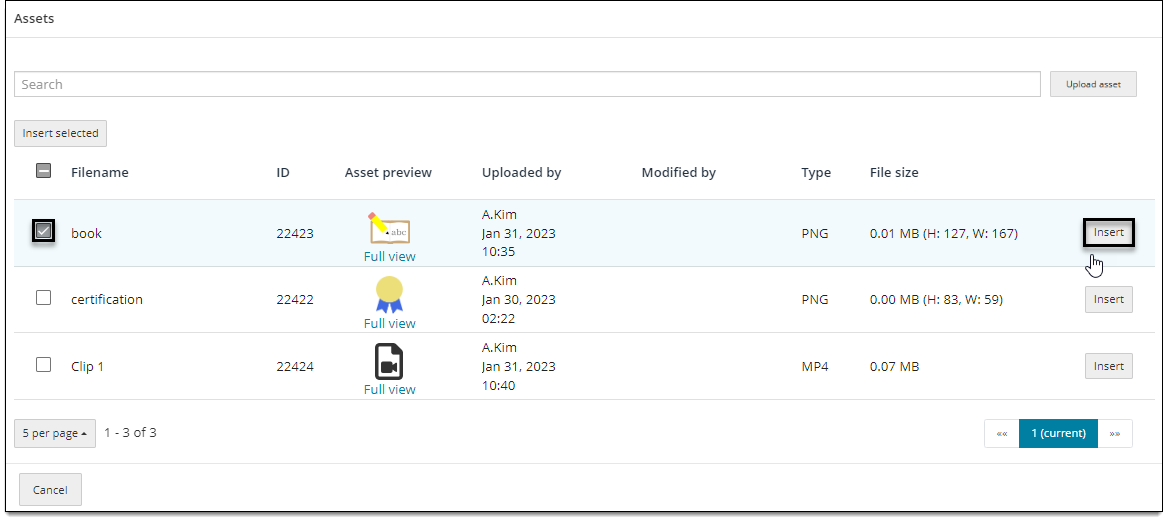
- In the Assets pop-up, you can choose an image from the list or upload a new image.
Choose an image from the Assets list
- Select the checkbox next to the asset name and click Insert. Or select multiple assets and click Insert selected.
- Use the search bar at the top of the window to search by asset name, ID, file type, etc.
- The image is added to the item.
- Click Save in the lower-right corner of the page.
- The item bank manager can configure assets to be displayed as an exhibit, in which case the asset will be added as an exhibit instead of a separate asset. Learn more about exhibits
Upload a new image
- Click Upload asset in the upper-right corner of the Assets pop-up.
- Choose an image stored on your computer. The image file is added to the Assets list.
- Select the checkbox next to the asset name and click Insert. Or select additional assets if needed and click Insert selected.
- The image is added to the item.
- The image is also added to the project's asset library and can be added to other items in the project.
- Click Save in the lower-right corner of the page.
Image properties
The following data is provided for each image:
- File name: the name of the image when it was uploaded to the item bank, not including the file type extension (e.g., "Image 1" not "Image 1.png".
- ID: the image asset ID; allows project managers and authors to search for the asset.
- Asset preview: a small thumbnail version is shown. Click Full View beneath the thumbnail to view the full-size image in a separate browser tab.
- Uploaded by: the name of the person who uploaded the image to the project item bank.
- Modified by: the name of the person who modified the image (in the project item bank settings, not within a question or exhibit).
- Type: the image file format/type, such as PNG or JPEG.
- File size: the size of the image in MB.
Change image size
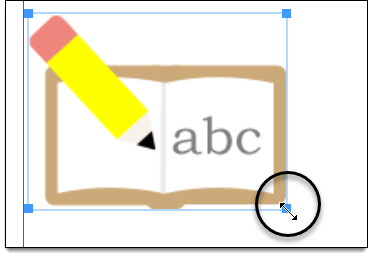
- Select the image, then click and drag one of the corners to increase or decrease the size.
- Or right-click the image and select Attributes, enter a specific Width and Height, and click Save.
- If you change either the Width or the Height when the Constrain proportions option is selected, the other dimension will automatically adjusts proportionally to match the modified dimension.
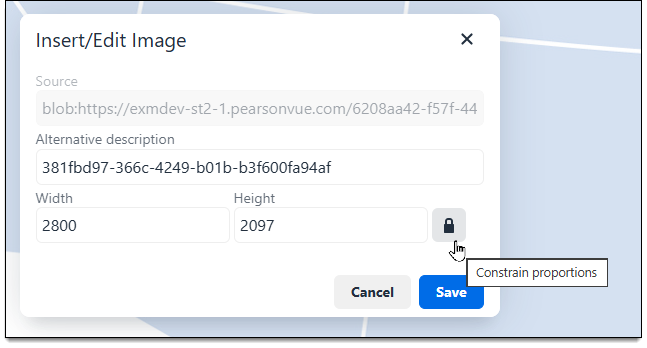
- If you change either the Width or the Height when the Constrain proportions option is selected, the other dimension will automatically adjusts proportionally to match the modified dimension.
Download an image
- Right-click the image and select Download.
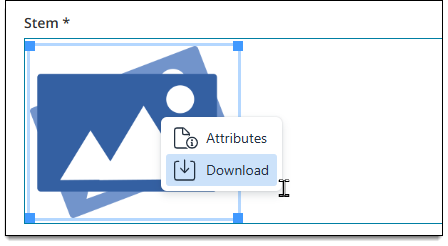
- The image file is sent to your Downloads folder.
Edit image alternative description
- Select the image, then right-click the image and select Attributes.
- Modify the Alternative description field as needed.
- Click Save.
Remove an image
- Click the image to select it (within the question or exhibit).
- Press the Delete or Backspace button on your keyboard.