Add questions and exhibits to a case
Before adding questions or exhibits, start a new case or open an existing case.
Add questions to the case
New or existing questions can be added to a case.  External items cannot be added to cases.
Add a new question
|
|
- In the Case panel, click inside the Question field and select Add new question. (Skip this step if a blank item template is already displayed.)
- Choose an item type from the drop-down list at the bottom of the page. Only items that the item bank manager has enabled will be available for selection.
- Author the item and click Save.
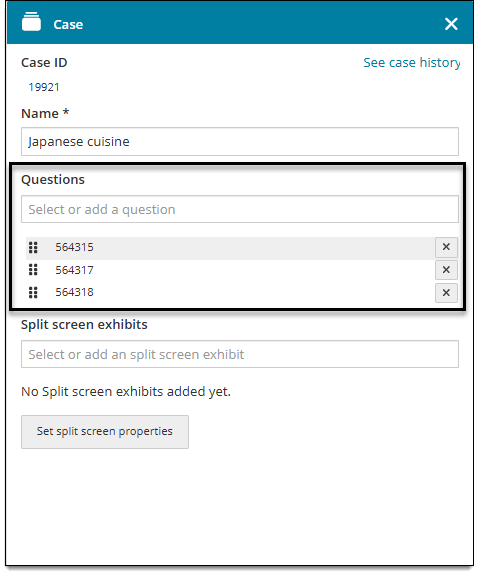
- The new question will be assigned an Item ID and added to the case. The item ID is listed in the Questions section of the Case panel.
Add an existing question
- In the Case panel, click inside the Question field and select an item ID.
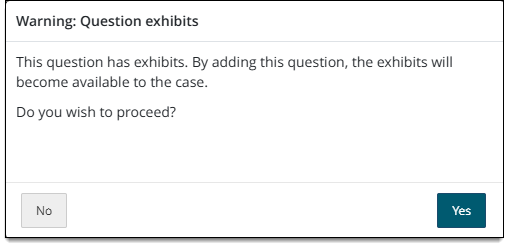
- If the question contains an exhibit, you will be prompted to confirm that you want to add the question and its exhibit to the case. (You cannot add the question without the exhibit; it can only be added to a case with the exhibit attached.) Click Yes to add the question and its exhibit, or click No to cancel adding the item.
- Once the question is added to the case, the associated item ID is shown in the Questions list of the Case panel.
- Click Save.
Edit questions
View or edit a question
|
|
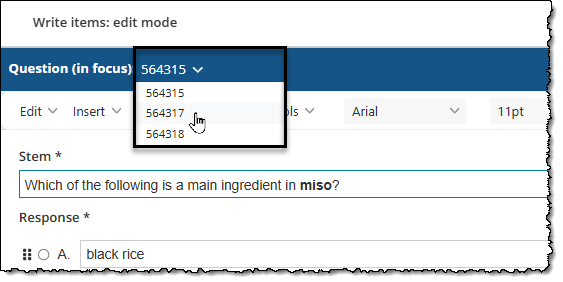
- To select a question, click the drop-down menu in the Question header and select the desired question.
- An eye icon is shown in the Case panel for questions that are 'view only' (you do not have permission to edit them).
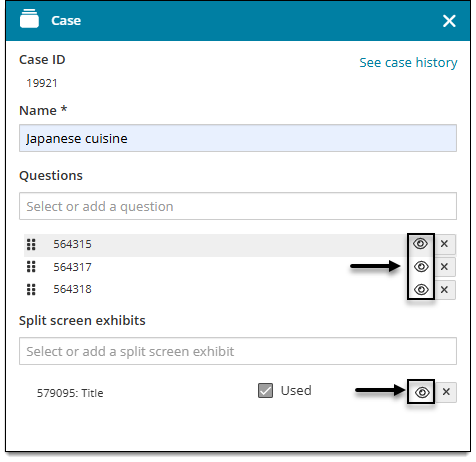
- An eye icon is shown in the Case panel for questions that are 'view only' (you do not have permission to edit them).
- Make the desired changes and click Save.
Remove a question
|
|
- In the Questions list of the Case panel, click the Remove
 button next to the item ID of the question that you want to remove.
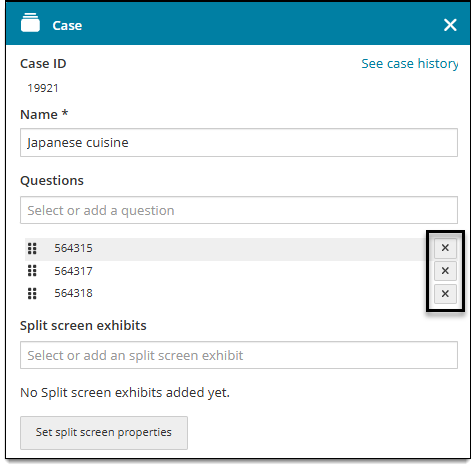
- The question is removed from the case and no longer appears in the Questions list.
- Click Save.
Change the order of questions
If you add a second item (or once the case contains at least two items), you change the order of questions in the case. This is the order that items will be presented to candidates during test delivery, as long as the project has the Export Cases as Sections (For QTI Packages) setting configured and the exam form setting is set as Sequential and not Random.
|
|
- In the Questions list of the Case panel, click and drag the move handles
 to rearrange questions. The first item in the list will be the default item for the case.
 - Click Save.
Add split screen exhibits
You can add new or existing exhibits to a case. Exhibits can only be used in an item if the item's template is configured to allow exhibits.
Add a new split screen exhibit
|
|
- In the Case panel, click inside the Split screen exhibits field and select Add new exhibit.
- When you add the exhibit, it is automatically set to In focus. To edit return to editing Question content, click Set as focus in the Question header
 .
.
- Choose an exhibit item type from the drop-down list at the bottom of the page. Only Display templates can be used for exhibits.
- Author the exhibit and click Save.
- The new exhibit will be assigned an Item ID and added to the case. The item ID is listed in the Split screen exhibits section of the Case panel.
- Click Used to indicate if the exhibit should be displayed during exam delivery with the item (question) that is currently in focus. (You may need to click Set as focus in the Question header first.)
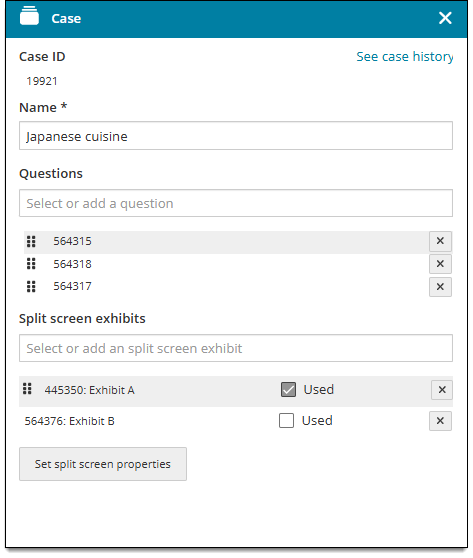
- If the template does not allow exhibits, a 'prohibited' icon will block you from selecting the Used checkbox.
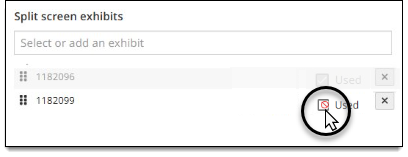
- If the template does not allow exhibits, a 'prohibited' icon will block you from selecting the Used checkbox.
- Click Set split screen properties to modify elements such as the orientation and ratio. View this page for more information on split screen exhibits. Only project managers have access to split screen properties.
- Click Save.

Add an existing split screen exhibit
- In the Case panel, click inside the Split screen exhibits field and select an exhibit.
- The exhibit is added to the case. The item ID is listed in the Split screen exhibits section of the Case panel.
- Click Used to indicate when the exhibit should be displayed with the current item in focus during exam delivery.
- Click Set split screen properties to modify elements such as the orientation and ratio. View this page for more information on split screen exhibits.
- If you edit the exhibit content, it will be updated anywhere else it used, such as other exams or projects.
- Click Save.
Edit split screen exhibits used in the case
View or edit an exhibit
|
|
- To view a different exhibit in the case, click the drop-down menu in the Exhibit header.
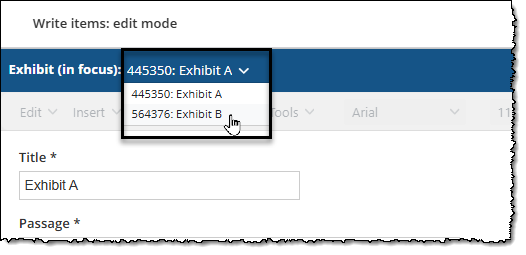
- An eye icon is shown in the Case panel for questions that are 'view only' (you do not have permission to edit).
- An eye icon is shown in the Case panel for questions that are 'view only' (you do not have permission to edit).
- Make the desired changes and click Save.
- If you edit the exhibit, it will be updated anywhere else it used, such as other exams or projects.
Remove an exhibit
|
|
- In the Split screen exhibits list of the Case panel, click the Remove button next to the ID of the exhibit that you want to remove.
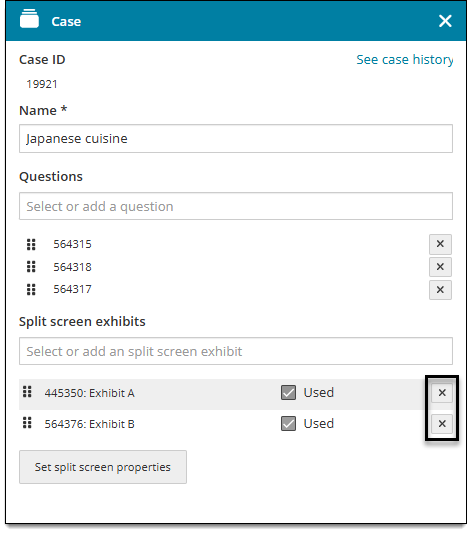
- Click Yes or Okay in the confirmation pop-up, depending on conditions described below:
- If more than one question is using the exhibit, the pop-up will display this warning. Click Yes to confirm that you want to remove the exhibit from the case, even though more than one question is currently using the exhibit.
- If you do not have editing rights to other questions that are using the exhibit, you will not be allowed to remove the exhibit from the case. Click Okay to accept and close the pop-up. You can still deselect the Used checkbox in the Case panel ↓ to remove the exhibit from questions that you have permission to edit.
- Once the exhibit is removed from the case, it will no longer appear in the Case panel.
- Click Save.
Mark an exhibit as 'not used' for a question
You can mark exhibits as 'not used' for certain questions. This allows you to use the same exhibit on some, but not all, questions within a case.
- Make sure the question you want to remove the exhibit from is 'in focus'. (Click the Set as focus button in the Question header .)
- In the Split screen exhibits list of the Case panel, deselect the Used checkbox next to the name of the exhibit that you want to remove.
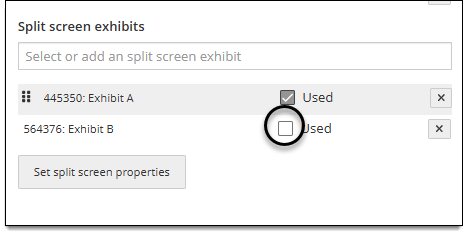
- Click Save.
Change the order of exhibits
If you add a second exhibit or if the case contains at least two exhibits, you can change the left-to-right order in which exhibits are displayed to candidates in the Exhibits tab. The order is configurable for each item in the case.
|
|
- In the split screen exhibits list of the Case panel, click and drag the move handles to rearrange exhibits. The first exhibit in the list will be the default exhibit shown for the item.
- Click Save.
Add a pop-up exhibit to a question in the case
|
|
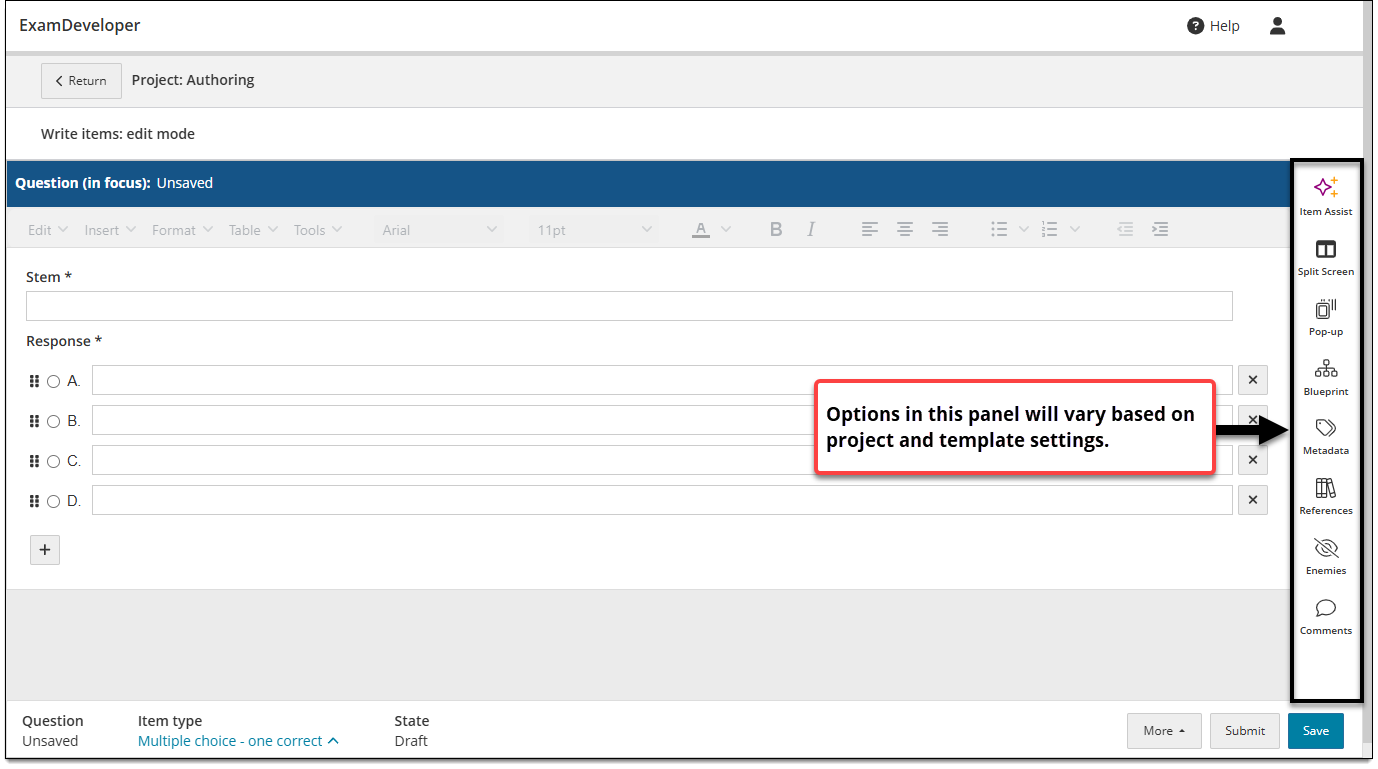
- Click Set as focus in the Question header . (Skip this step if the question is already in focus.)
- In the item settings panel
 , click Pop-up.
- You won't see this option if the item template is not configured for pop-up exhibits.
- Choose an exhibit item type from the drop-down list at the bottom of the page.
- Only Display templates can be used for exhibits.
- See Add pop-up exhibits for more information.
Next steps
Once you add questions and exhibits to a case, you can preview and submit them for review.