Spreadsheet (item type)
Spreadsheet item types display item content with a spreadsheet editor. The candidate is asked to enter data in the provided rows and columns. Points can be awarded as all-or-nothing (the entire spreadsheet must be correct), or they can be awarded points for each correct response.
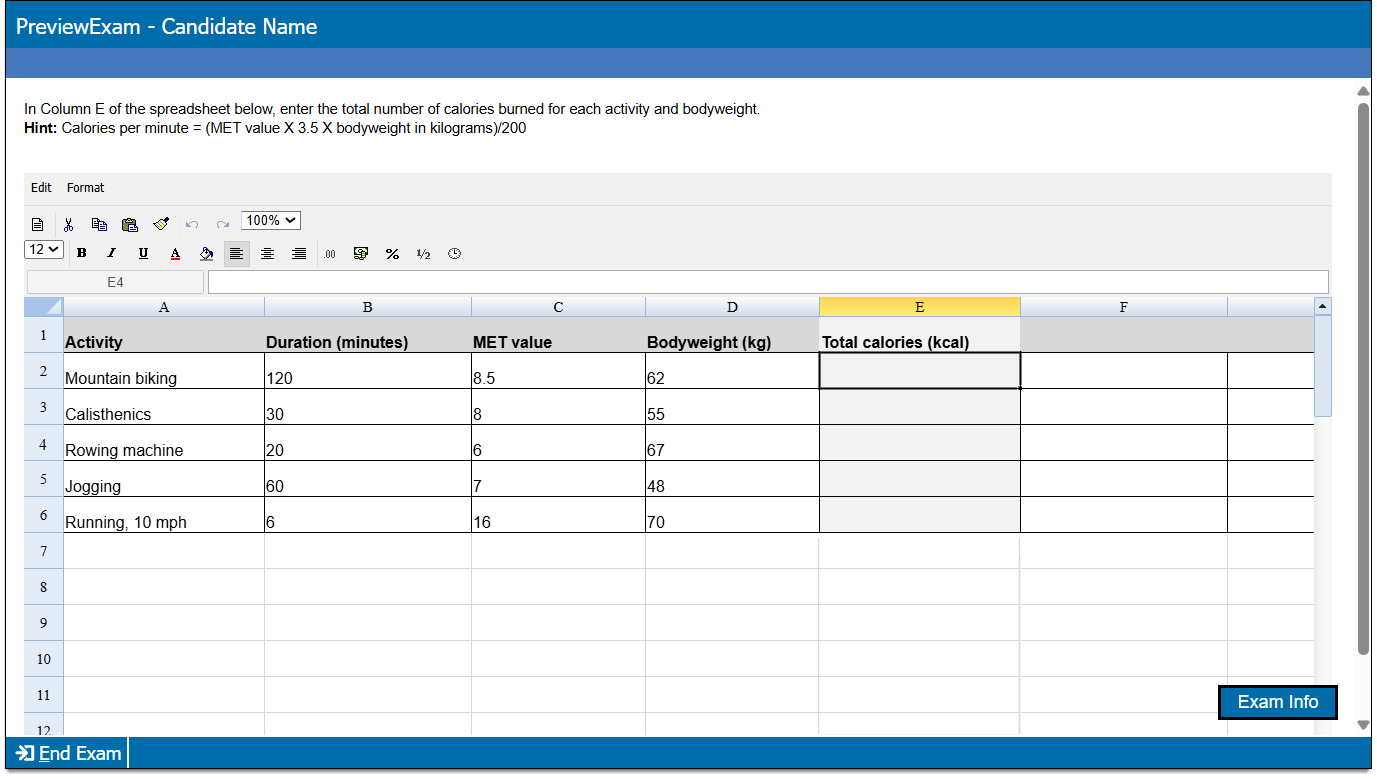
Add item content
|
*Note: Each content component (the stem or question) contains either text or media and may have a custom label. For example, a text component may be labeled as "Question" or "Stem", and a media component may be labeled as "Media", "Video", or "Audio". |
- In the Content component* field(s), enter text or upload the required media file type, depending on the item requirements.
- For text components, you can format text or add tables, images, and equations.
- If configured for your project, some text components (such as stem and basic response options) can include variables or dynamic text. (These are not available for all item templates or text fields.) View unsupported item typesView unsupported item types
Variables not supported for:
- Display
- External QTI
- Selectable text
- Audio capture
- Audio capture with video
- Some custom templates (depends on configurations)
Dynamic text not supported for:
- Audio capture
- Audio capture with video
- Selectable text
- Some custom templates (depends on configurations)
- If configured for your project, some text components (such as stem and basic response options) can include variables or dynamic text. (These are not available for all item templates or text fields.) View unsupported item typesView unsupported item types
- For media components, you will only be able to add the types of media configured for the item type (for example, you may be able to add audio files such as MP3, but not video files such as MP4).
- For text components, you can format text or add tables, images, and equations.
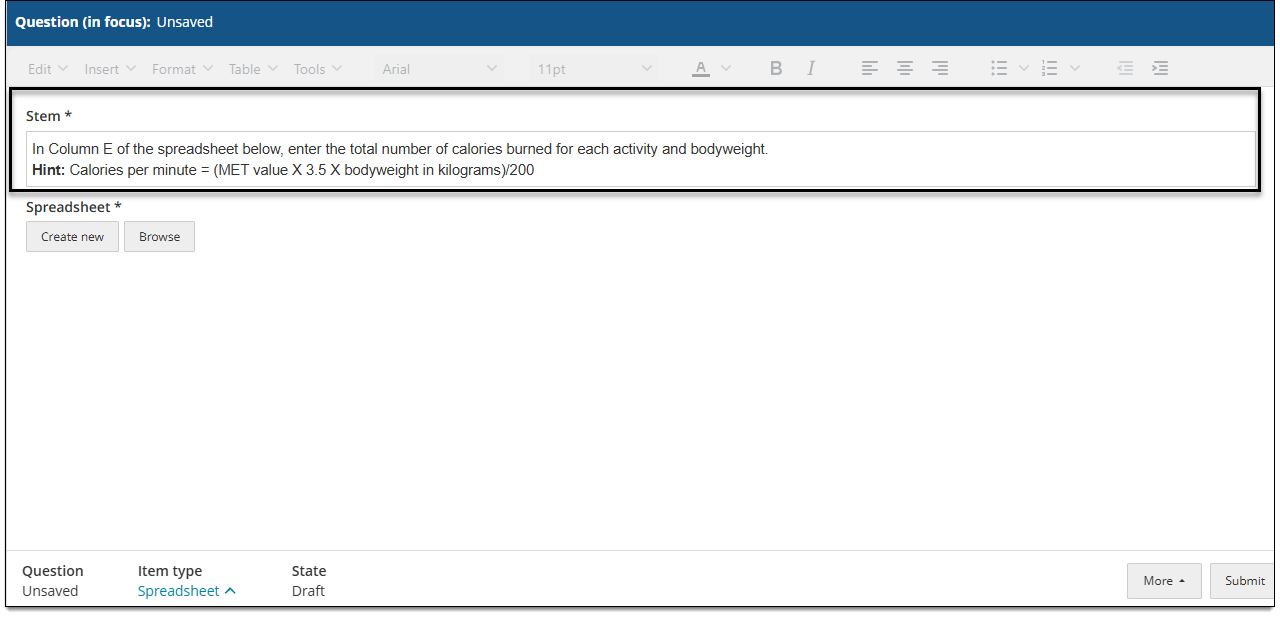
Add spreadsheet
 The settings in this section will vary according to the item template settings.
Create a new spreadsheet
|
|
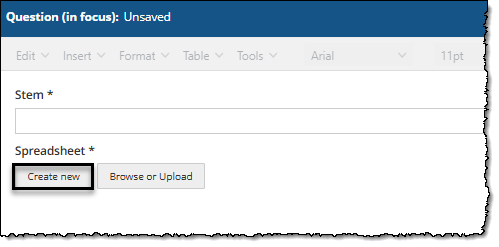
- Click Create new to start a new spreadsheet asset.
- In the New spreadsheet window, enter a name for the spreadsheet and click Apply.
- The spreadsheet editor is displayed and you can begin creating and editing the spreadsheet. For example, label rows and columns, add text, format the text, etc.
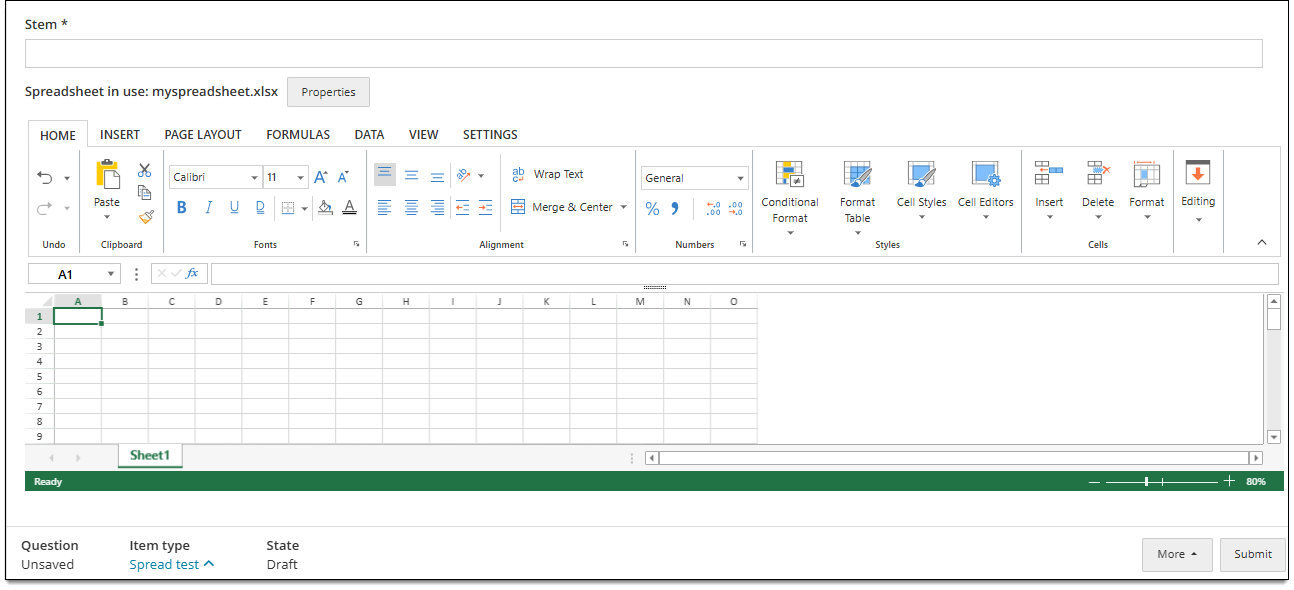
- Click Save for the item.
- The spreadsheet will be saved as a new asset (as an XLSX file) in the project's asset library.
Upload a spreadsheet
|
|
- Click Browse or Upload to upload an existing spreadsheet asset.
- Find the desired spreadsheet in the Assets list. If needed, click Download in the Asset preview column to review the content. You won't be able to change the spreadsheet within the item once you add it.
- Click Insert.
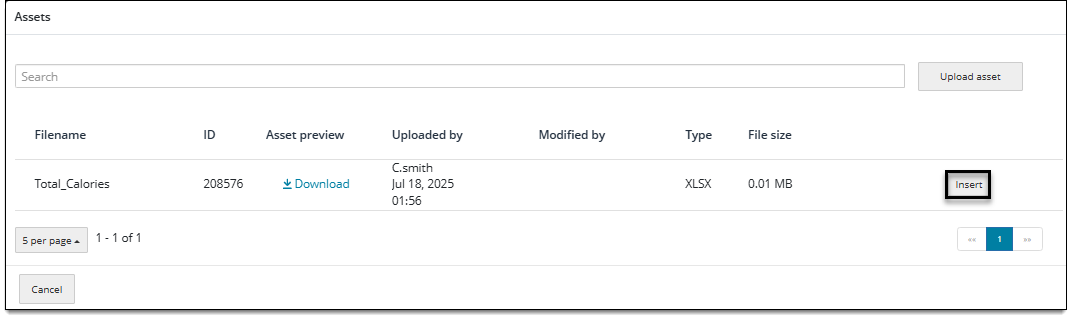
- You can now edit the spreadsheet if needed. For example, you can label rows and columns, add text, and format the text. If you make any changes to the spreadsheet, your changes will also be saved to the asset within the project's asset library.
- Click Save for the item.
- Your changes are saved in the item and to the spreadsheet asset, if applicable.
Choose spreadsheet type
|
|
- Click Properties.
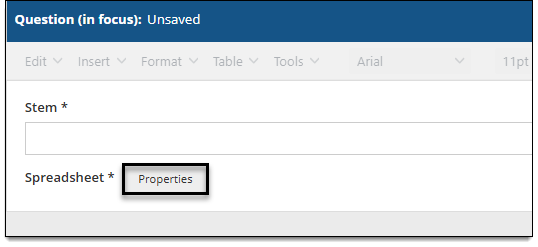
- In the Properties window, choose one of the Spreadsheet types:
- Select from assets: Authors will create a new spreadsheet or upload an existing spreadsheet that is stored in the project's asset library. These templates can include populated data and formatting such as header rows and column width, and can be edited by item authors. (Editing a spreadsheet in the item also updates the asset itself.)
- Use default created by the driver: A default spreadsheet will be rendered during exam delivery. Authors cannot edit this spreadsheet.
- Click Apply.
- Depending on your selection in step 2, you will now see either a Properties button or Create new/Browse or Upload buttons.
Delete and replace a spreadsheet
If spreadsheet assets are enabled, you can change to a different spreadsheet.
- Click
 next to the spreadsheet asset name to remove it.
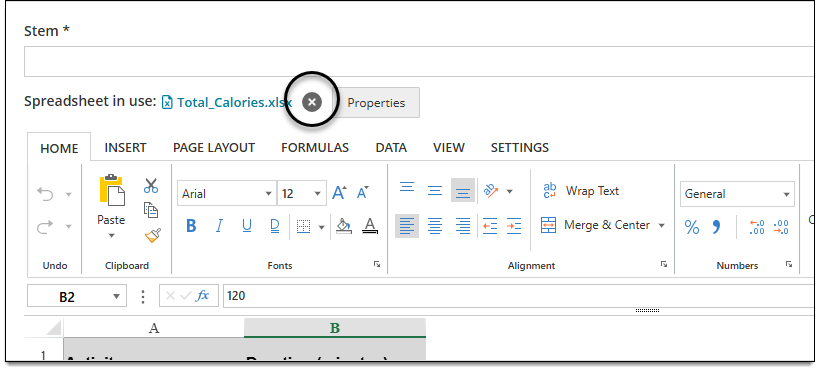
- The spreadsheet is removed from the item. Click Browse or Upload to upload a new spreadsheet asset.
Set spreadsheet properties
Once a spreadsheet is added to the item, you should see a Properties button. This is where you set the scoring rules for the item. You can also update the maximum number of rows and columns displayed in the spreadsheet, or choose a different frame height (changes how tall the spreadsheet editor will appear on screen during exam delivery).
- Click the Properties button above the spreadsheet.
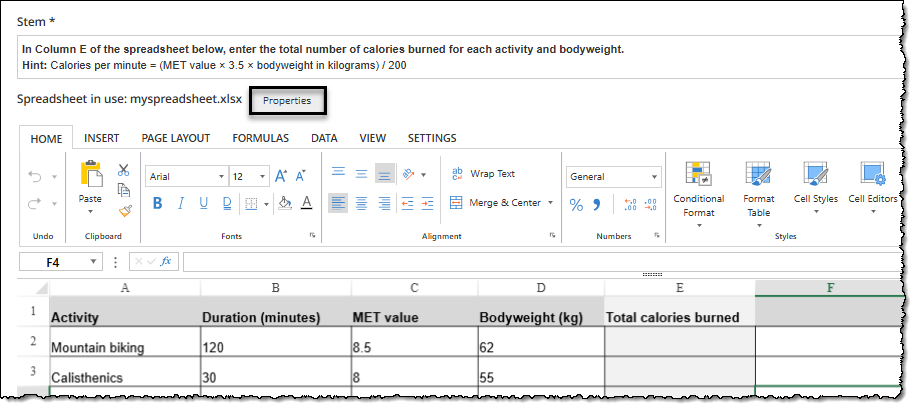
- Under Scoring rules, choose one of the following:
- Automated test driver scoring: the spreadsheet response is scored by the test driver according to the correct responses that you specify. If you choose this option, you must configure the scoring rules as described in the Configure scoring rules ↓ section below.
- Manual scoring via results file: A human will score the spreadsheet response instead of the test driver. You can configure a weighted scoring rule (only at the item level) as described in the Configure scoring rules ↓ section below.
- If desired, change one or more of the following fields:
- Maximum rows: Specify the number of rows (from 1-500) that to be included in the spreadsheet.
 If you are using a spreadsheet asset and reduce the number of rows, you may delete existing data in the spreadsheet asset.
 - Maximum columns: Specify the number of rows (from 1-100) that to be included in the spreadsheet. If you are using a spreadsheet asset and reduce the number of columns, you may delete existing data in the spreadsheet asset.
- Frame height: Specify the height of the spreadsheet frame in pixels, between 1-9999. The recommended minimum height is 325.
- Maximum rows: Specify the number of rows (from 1-500) that to be included in the spreadsheet.
- Click Apply.
Configure scoring rules
Scoring rules (configured in the spreadsheet Properties window ↑) are based on the selected Weight type. For Manual scoring, only the Default and Item weight types can be used.
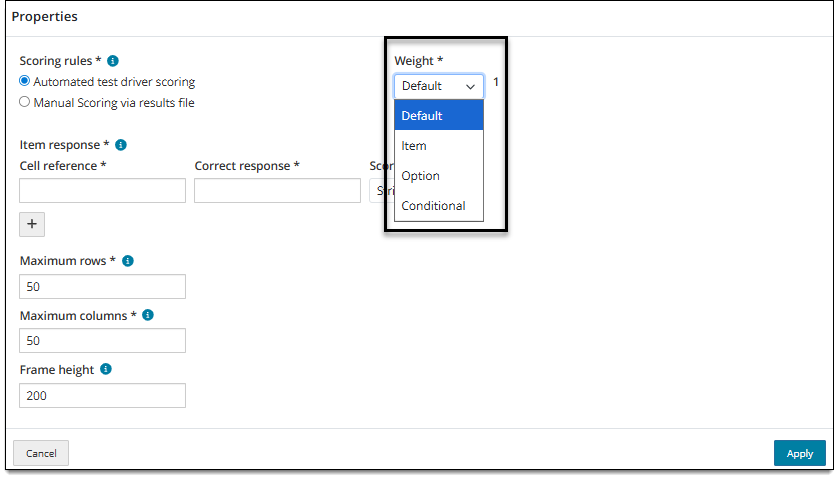
Weight: Default
This weight type assigns a single score of 1 or 0 to the entire spreadsheet response. One point is awarded only if the candidate submits all of the correct responses and none of the incorrect responses. (You cannot change the Weight value; the entire set of responses is worth 1 point.)
- Choose Default from the Weight drop-down.
- The following steps apply to Automated scoring only.
- In the Item response section, add each Cell reference (the cell identifier, such as "A1") and its Correct response (the response that the candidate must provide in that cell to earn the point).
- To add multiple response options in a single cell ("or" conditions), insert a pipe delimiter | between each possible correct response. For example, apples|bananas would award the total possible points for the cell if either "apples" or "bananas" is submitted.
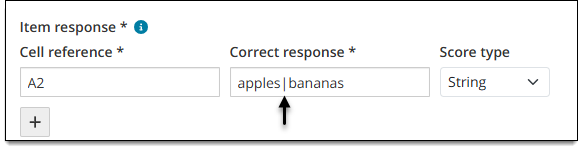
- To add multiple response options in a single cell ("or" conditions), insert a pipe delimiter | between each possible correct response. For example, apples|bananas would award the total possible points for the cell if either "apples" or "bananas" is submitted.
- For each correct response, choose String or Numeric from the Score type drop-down to indicate whether the response should be read as string data or numeric data. (The default is String, used for alphanumeric and special characters.)
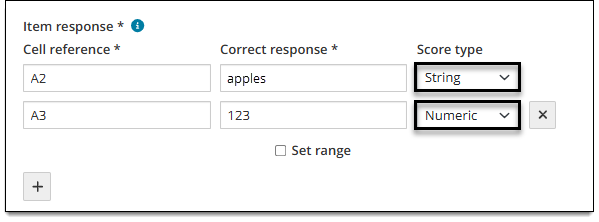
- If you choose Numeric as the score type, you can specify a range of values as a correct response instead of a single value. See Set ranges for numeric responses ↓ for instructions.
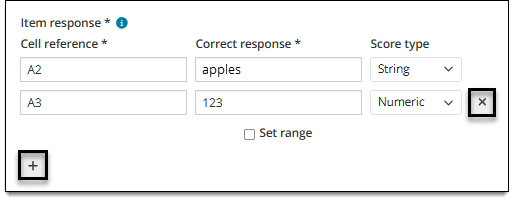
- Click the Add
 button to add additional responses. Click the Remove
  button next to a response to remove it from the scoring rules.
- Click Apply to save the scoring rules.
Weight: Item
This weight type assigns a single score to the entire spreadsheet response, but the total point value can be something other than 1. For example, if you specify a value of 3, the candidate earns a score of 3 if all correct responses in all cells are submitted and no incorrect responses are submitted.
- Choose Item from the Weight drop-down.
- Specify the point value (weight) for the item. For example, if you enter 3, candidates earn 3 points if all correct responses and no incorrect responses are given.
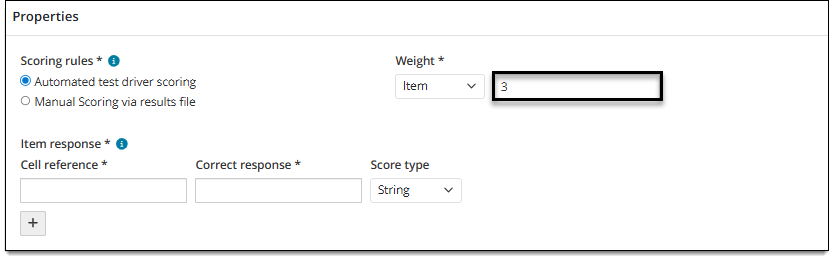
- The following steps apply to Automated scoring only.
- In the Item response section, add each Cell reference (the cell identifier, such as "A1") and its Correct response (the response that the candidate must provide in that cell to earn the point).
- To add multiple response options in a single cell ("or" conditions), insert a pipe delimiter | between each possible correct response. For example, apples|bananas would award the total possible points for the cell if either "apples" or "bananas" is submitted.
- For each correct response, choose String or Numeric from the Score type drop-down to indicate whether the response should be read as string data or numeric data. (The default setting is String, used for alphanumeric and special characters.)
- If you choose Numeric as the score type, you can specify a range of values as a correct response instead of a single value. See Set ranges for numeric responses ↓ for instructions.
- Click the Add button to add additional responses. Click the Remove button next to a response to remove it from the scoring rules.
- Click Apply to save the scoring rules.
Weight: Option
|
|
This weight type assigns a separate score to each correct response. Each correct response can be assigned a different weight. For example, a correct response in A1 can be scored as 2 points while a correct response in A2 is scored as 1 point.
- Choose Option from the Weight drop-down.
- In the Item response section, add each Cell reference (the cell identifier, such as "A1") and its Correct response (the response that the candidate must provide in that cell to earn the point).
- To add multiple response options in a single cell ("or" conditions), insert a pipe delimiter | between each possible correct response. For example, apples|bananas would award the total possible points for the cell if either "apples" or "bananas" is submitted.
- For each correct response, choose String or Numeric from the Score type drop-down to indicate whether the response should be read as string data or numeric data. (The default setting is String, used for alphanumeric and special characters.)
- If you choose Numeric as the score type, you can specify a range of values as a correct response instead of a single value. See Set ranges for numeric responses ↓ for instructions.
- Specify the point value for each correct response.
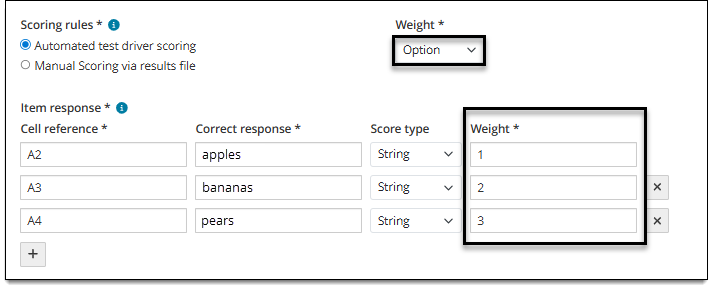
- Click the Add button to add additional responses. Click the Remove button next to a response to remove it from the scoring rules.
- Click Apply to save the scoring rules.
Weight: Condition
|
|
This weight type assigns a separate score to each group of responses. Each group of correct responses can be assigned a different weight. For example, a correct response in A1 and A2 can be scored as 2 points, but both A1 and A2 responses must be correct to earn 2 points; in addition, a correct response in A3, A4, and A5 can be scored as 3 points, but all three correct responses must be given to earn the 3 points.
- Choose Condition from the Weight drop-down.
- In the Item response section, add each Cell reference (the cell identifier, such as "A1") and its Correct response (the response that the candidate must provide in that cell to earn the point).
- To add multiple response options in a single cell ("or" conditions), insert a pipe delimiter | between each possible correct response. For example, apples|bananas would award the total possible points for the cell if either "apples" or "bananas" is submitted.
- For each correct response, choose String or Numeric from the Score type drop-down to indicate whether the response should be read as string data or numeric data. (The default setting is String, used for alphanumeric and special characters.)
- If you choose Numeric as the score type, you can specify a range of values as a correct response instead of a single value. See Set ranges for numeric responses ↓ for instructions.
- To add additional responses to a set, click AND Condition and specify each Cell reference and its corresponding Correct response.
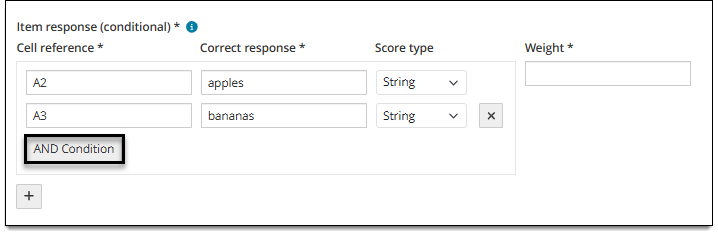
- To add another response set (a separate response or group of responses that correspond to a separate point value/weight), click the Add button and add the cell references with their correct responses.
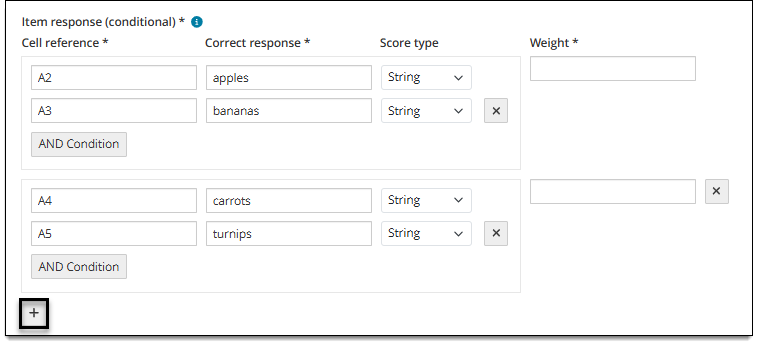
- Specify the Weight for each response set.
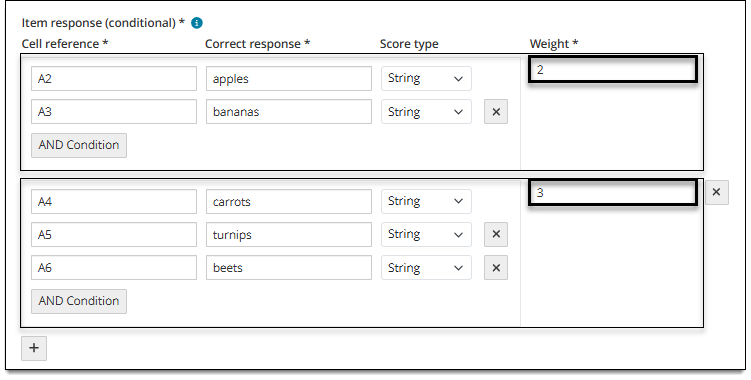
- Click the Add button to add additional responses. Click the Remove button next to a response to remove it from the scoring rules.
- Click Apply to save the scoring rules.
Set ranges for numeric responses
|
|
If you choose Numeric as the Score type for a response, you can also specify a range of allowed responses instead of a single response.
- Select the Set range checkbox.
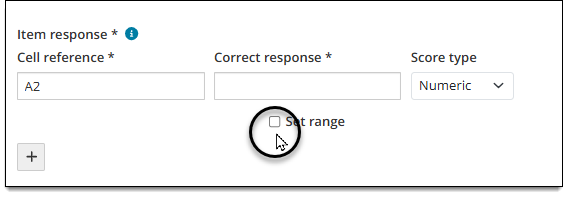
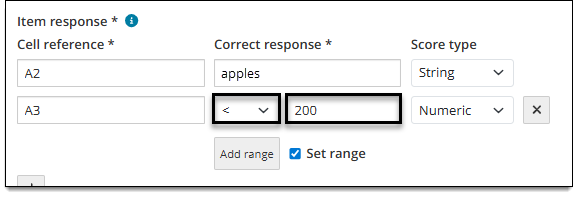
- The Correct response field becomes a drop-down and a text field. From the drop-down, choose an operator such as less than < or greater than >. In the text field, enter the value that specifies the range. For example, if the correct response is any value less than 200, enter 200 in the text field.
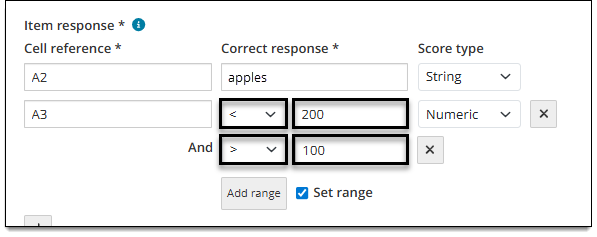
- To add additional conditions to the response range, click the Add range button. Then add the additional condition. For example, if you want to allow any value between 101 and 199, you can specify "less than 200" and "greater than 100".
- Click Apply to save the scoring rules.
How the item is scored
Scoring depends on the configurations defined in the item type template.
- With Automated test driver scoring, the spreadsheet response is scored by the test driver according to correct response configurations set in the scoring rules ↑. "Correct" responses are designated as specific values in specific cells.
- With Manual scoring via results file, a human, not a machine, will score the response from the exam results file. No scoring is applied at the time of exam delivery and no response processing is exported with the QTI. However, you can configure a weighted scoring rule (only at the item level) as described in the Configure scoring rules ↑ section.
- No scoring means there is no correct or incorrect answer. This scoring model is used for items such as survey questions or pretest items.
Additional options
See Author an item for a complete guide to item editing, including how to format text, add tables, insert images and media, apply metadata, select a blueprint area, etc.