Generate items with Item Assist
|
|
With Item Assist, you can automatically generate new exam items using AI-assisted item writing technology. You'll enter the number of items to generate, select a blueprint domain if required, and apply any required metadata and parameters. Once the items are generated, you can manually review and make edits before advancing them to the next stage.
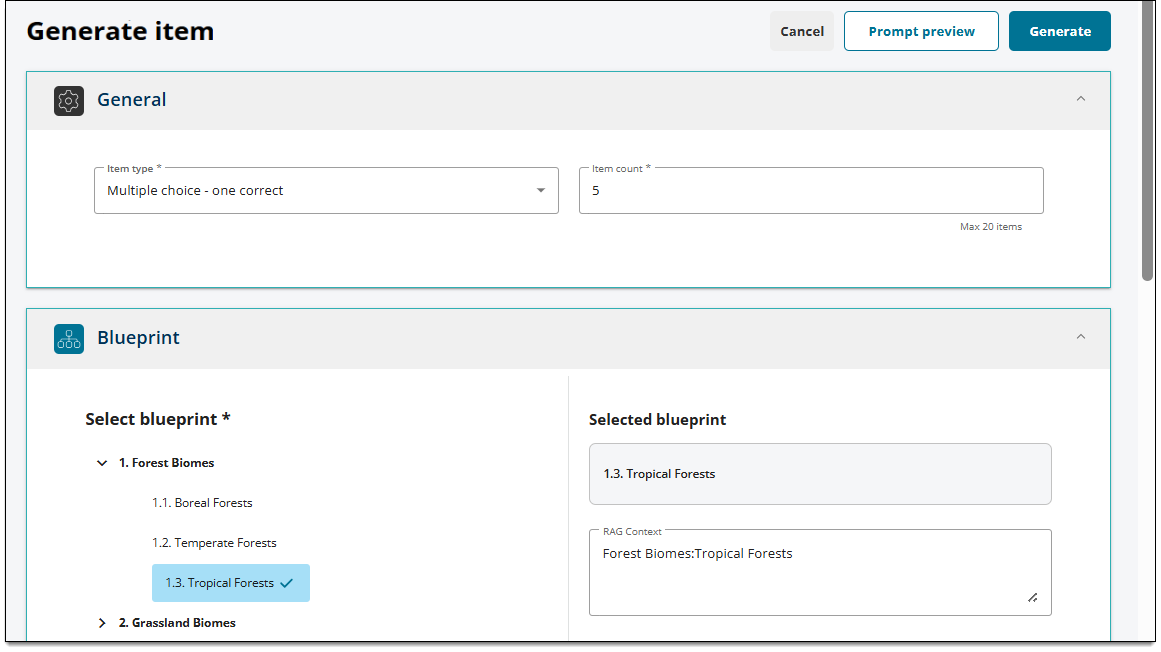
Open Item Assist
- Sign in through the Navigator portal. You will be taken to your ExamDeveloper dashboard.
- On the dashboard, click the Generate item button.
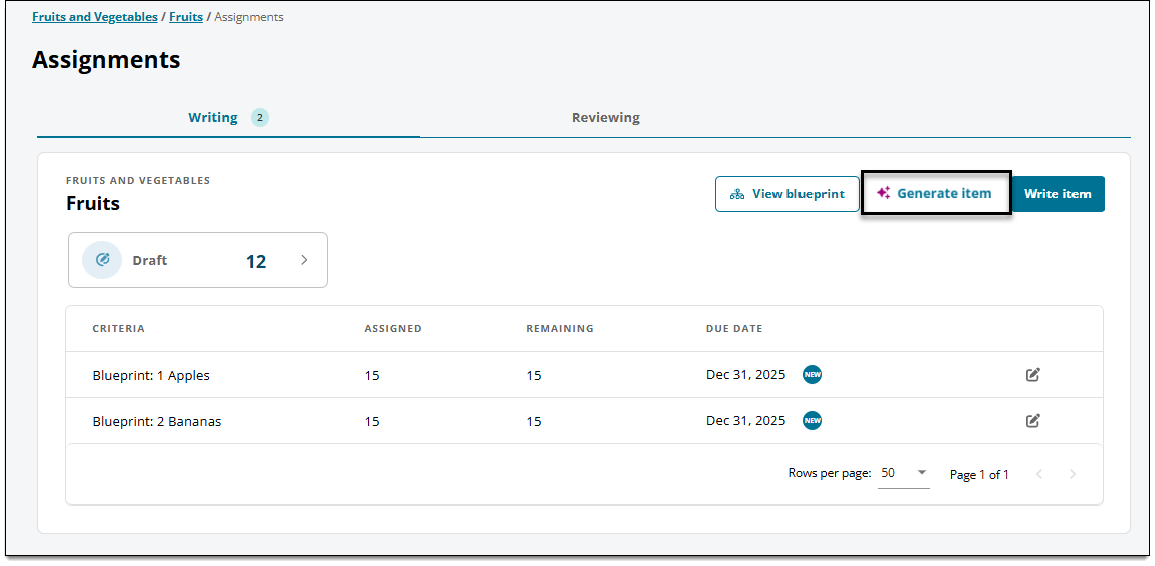
Choose item type and item count
Tell Item Assist what item type template to use and how many items to generate.
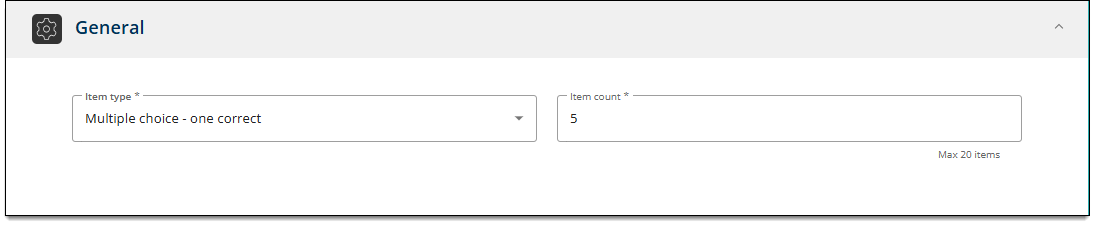
- In the General section, select a template from the Item type menu.
 Currently, Item Assist only supports Multiple choice - one correct, Essay, and Display item types. In addition, you will only be able to generate items using the specific templates that the project manager has enabled.
 - An AI-generated item includes the item content, references, a rationale, and metadata. Exhibits, media, and delivery settings are not included.
- Only one content component (stem, passage, etc.) per item will be generated.
- Enter the number of items to generate in the Item count field.
- You can generate up to 10 items at once.
Select a blueprint topic
Selecting a blueprint topic classifies the item within the project's blueprint and tells Item Assist which topic, subject area, content area, etc. to focus on when generating items.
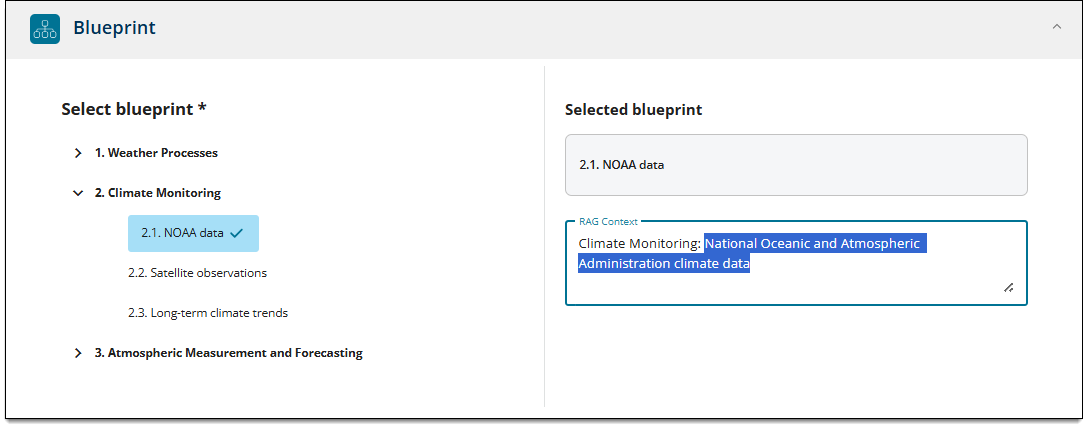
- On the left side of the Blueprint section, click the desired blueprint topic.
- You can leave the top-level topic selected, or choose a sub-topic if available.
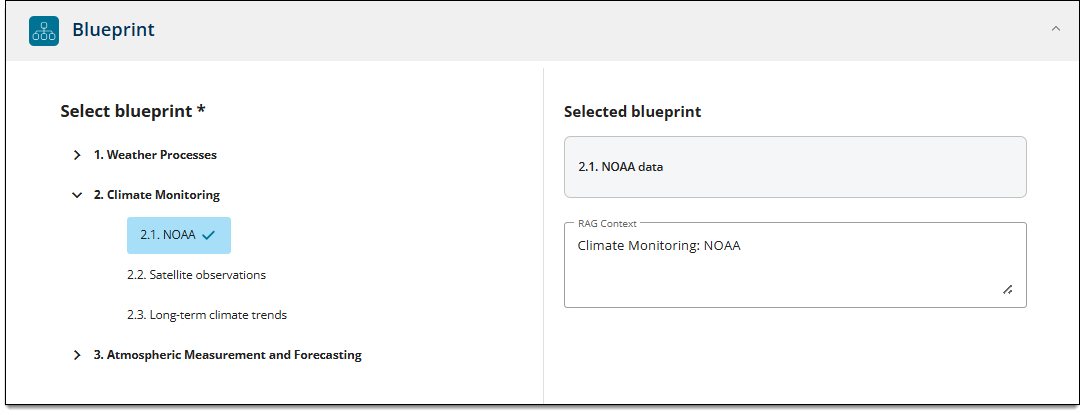
- The topic you selected will be shown on the right side.
- Include sections above in the blueprint hierarchy: When selected, Item Assist will focus on the selected topic as well as any topics above it in the hierarchy when generating items. For example, in the image shown below Item Assist would focus on all topics from "1. Regulations" through the selected sub-topic, "3.2 Effects of Weather on Performance" .
Edit RAG context for selected blueprint topic
Your blueprint selection determines which specific area of the blueprint hierarchy is sent as search context to Item Assist (i.e., the "RAG context"). However, in some cases the auto-generated context for a certain blueprint level will be too broad or generic. In this case, you can edit the context manually to have Item Assist focus on a more specific topic for better results. Or you can edit the context in other ways, such as updating or clarifying terminology.
- In the Selected blueprint panel, input text in the RAG context field to define the specific context that should be sent to Item Assist.
- The prompt preview ↓ does not show updated RAG context.
In the example blueprint shown below, "NOAA data" may not be specific enough for Item Assist to narrow down to the intended topic. The RAG context is being edited to clarify what NOAA stands for, as well as to specify what type of NOAA data should be used as the context for the generated questions:
Add metadata
|
|
Apply metadata to help Item Assist generate relevant item content by specifying certain criteria, such as subject areas or cognitive levels.
- In the Metadata section, hover over any tooltips to review additional guidance left by the project manager.
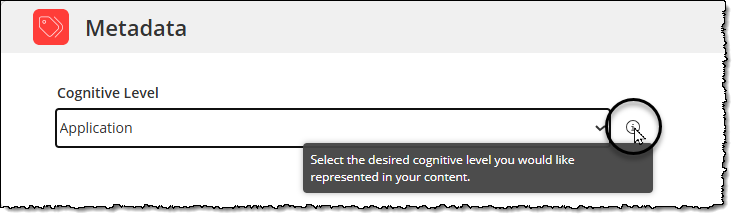
- Select options or enter text. The types of available metadata are determined by the project manager.
Add additional author prompts
|
|
Like metadata, author prompts provide additional guidance to Item Assist. However, these prompts can be customized even further to define nearly any type of specification, such as item development principles, style guides, sample stem structures, or sample response options.
- In the Additional author prompts section, hover over any tooltips to review additional guidance left by the project manager.
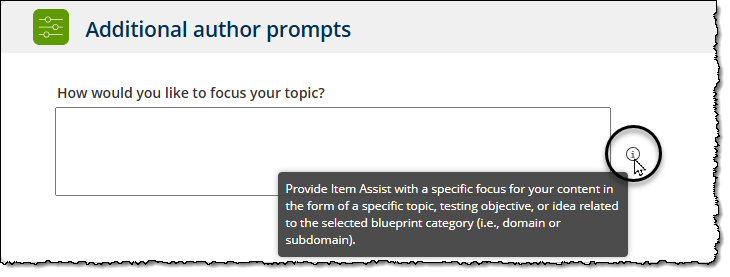
- Add text based on the provided instructions.
- For example, if the instructions ask you to provide a specific topic you could input "effects of tornadoes on drone performance".
Preview the prompt
Before generating items, you can preview the complete and exact prompt that will be sent to Item Assist — including your metadata, blueprint, and additional author prompt selections.
The prompt and its preview do not include any added RAG context from the Blueprint section. It does include a background system prompt that cannot be modified; this portion of the prompt connects the AI output to ExamDeveloper.
- Once you have provided all of the required information (blueprint, metadata, additional author prompts, etc.), click Prompt preview (located next to the Generate button).
- You cannot preview the prompt until all required fields have a selection or input.
- A read-only modal is displayed, showing you the final prompt that will be sent to Item Assist.
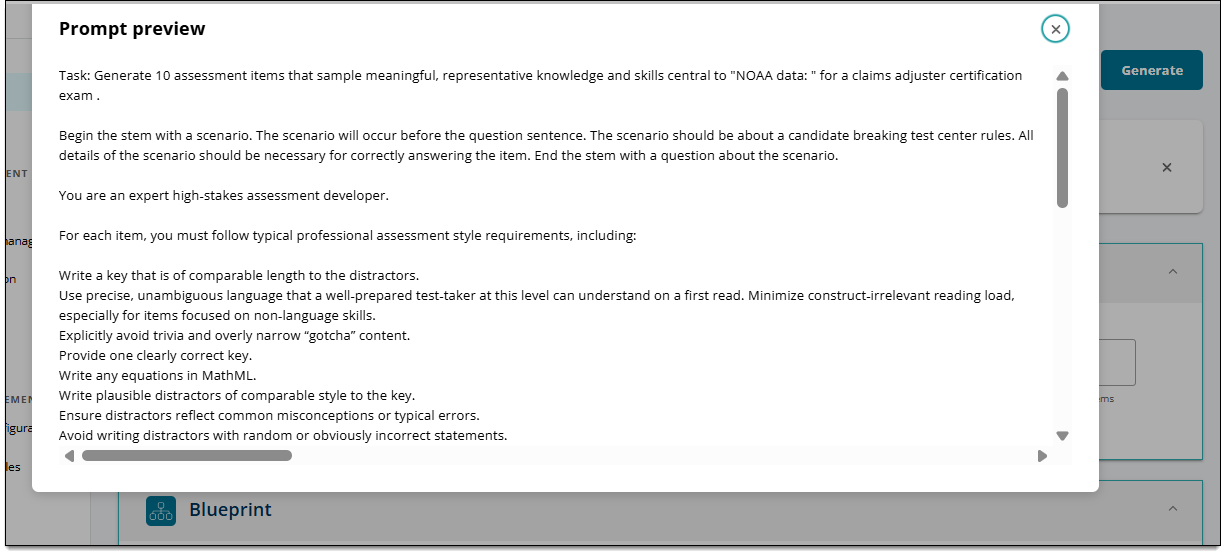
- If needed, make changes to your selections/input and click Prompt preview again to review the changes.
Generate and review items
Once all the required sections are complete, you can generate your items.
- Click Generate in the lower-right corner of the page.
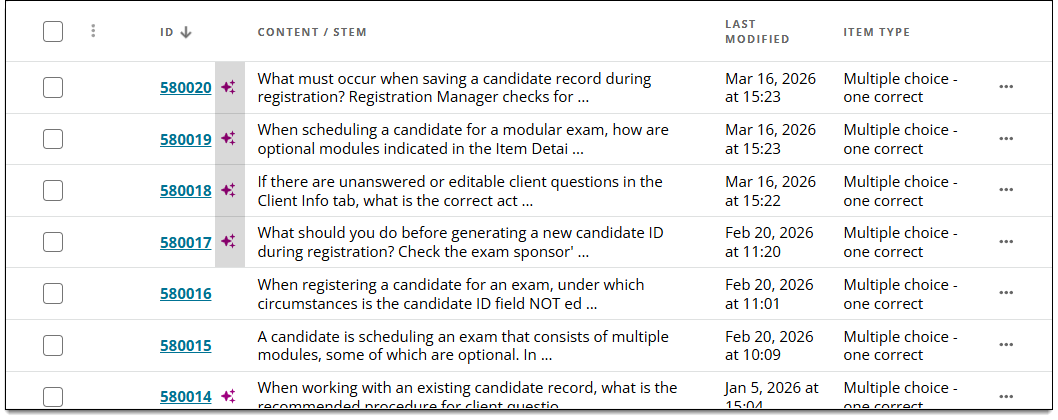
- The new items will be added to your Drafts page marked with a special icon
 to indicate that the item was generated using Item Assist.
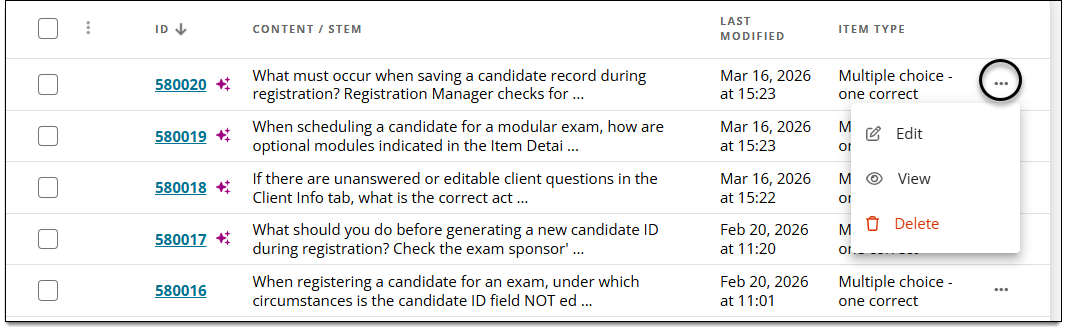
- Click the ellipses ... for a specific item and select Edit or View.
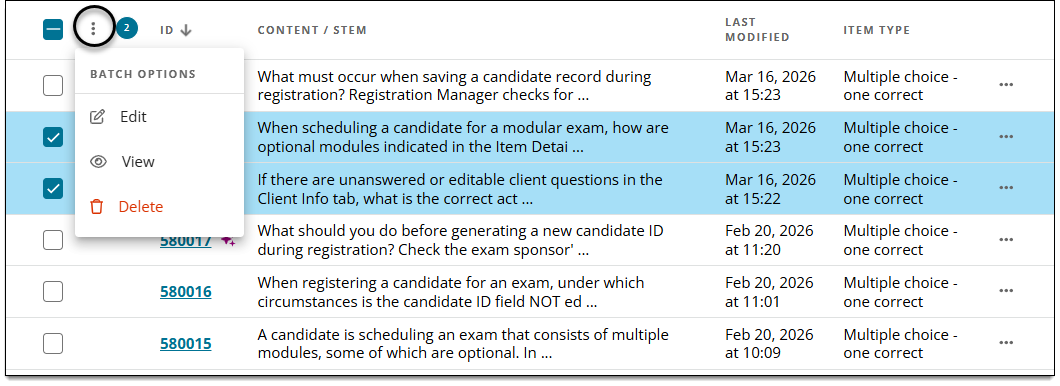
- To view multiple items at once, select all desired items. Then click the three dots menu
 and select Edit or View.
- To view multiple items at once, select all desired items. Then click the three dots menu
- If you selected multiple items, use the navigation buttons in the upper-right corner of the page to move between them.
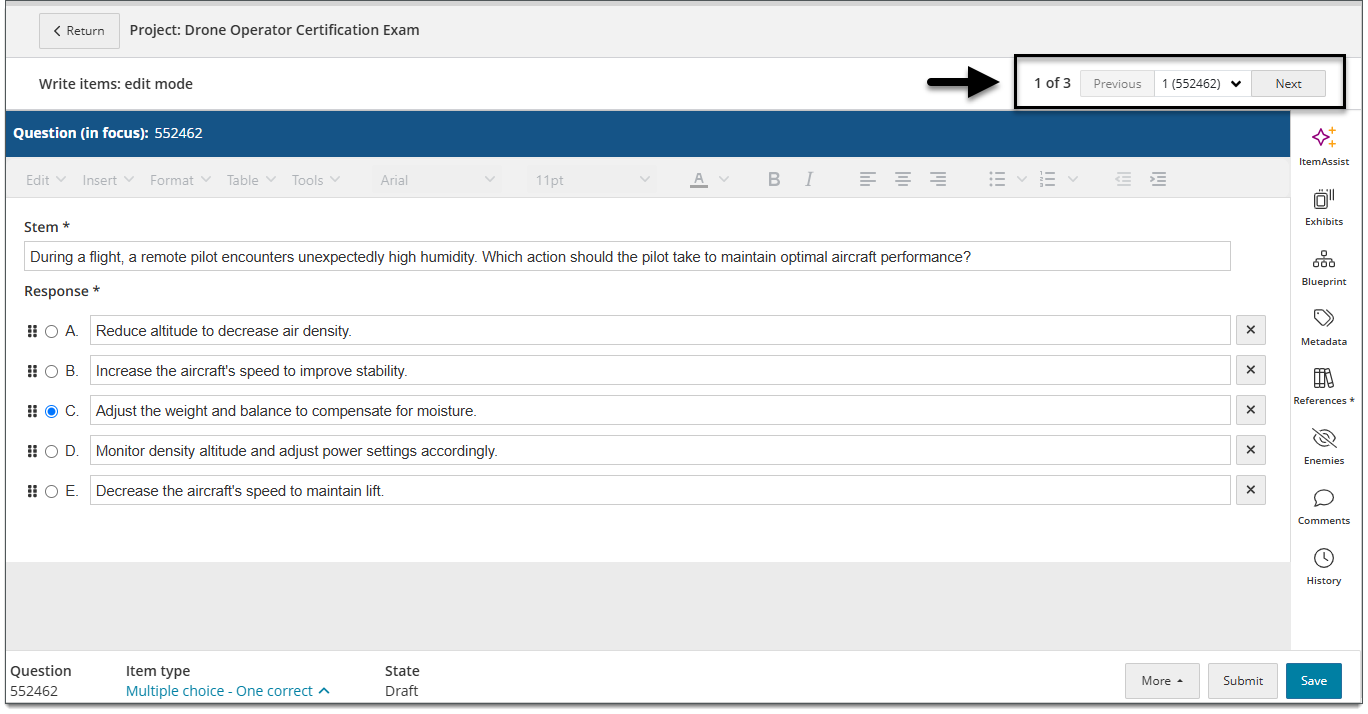
- Edit the items as needed. For example, you can change the content, add assets or media if allowed, leave comments, add exhibits, etc. Note the following properties may have been automatically applied to the generated item:
- The blueprint you selected before item generation is applied in the Blueprint panel, and the metadata you applied is shown in the Metadata panel. You can change the blueprint or metadata if needed.
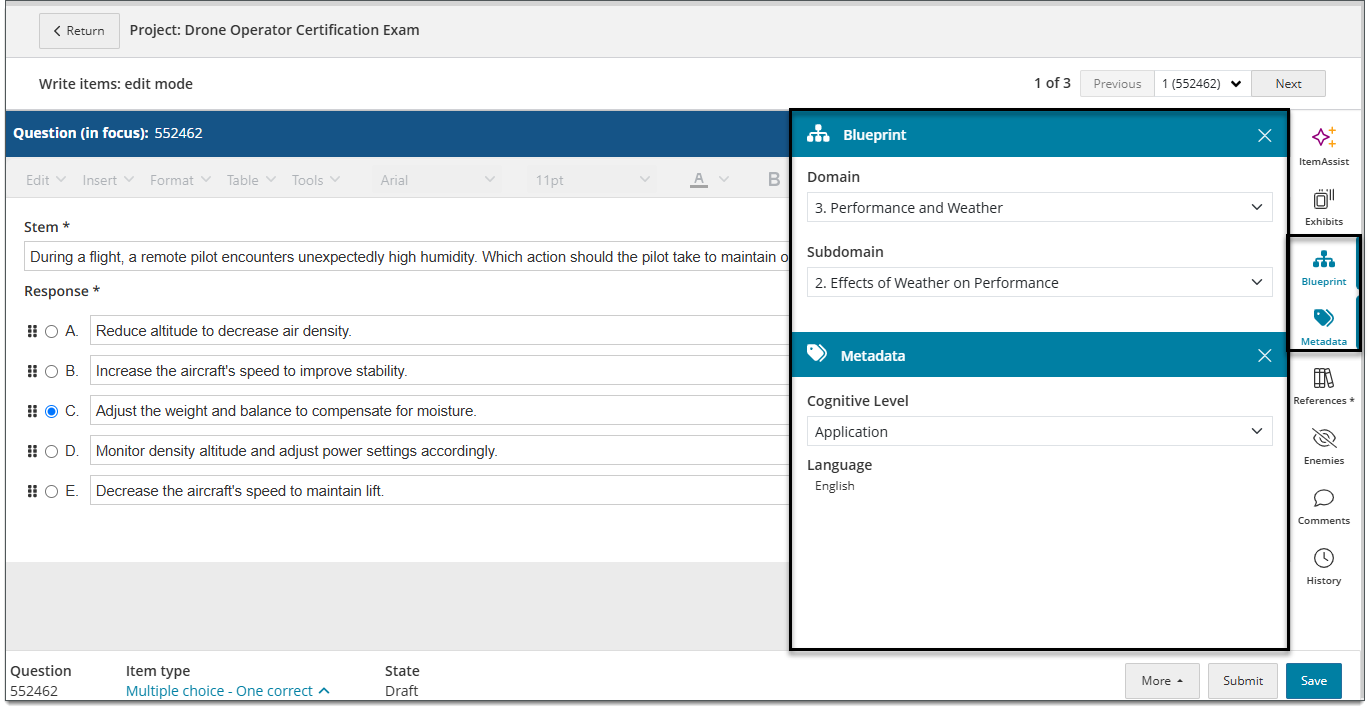
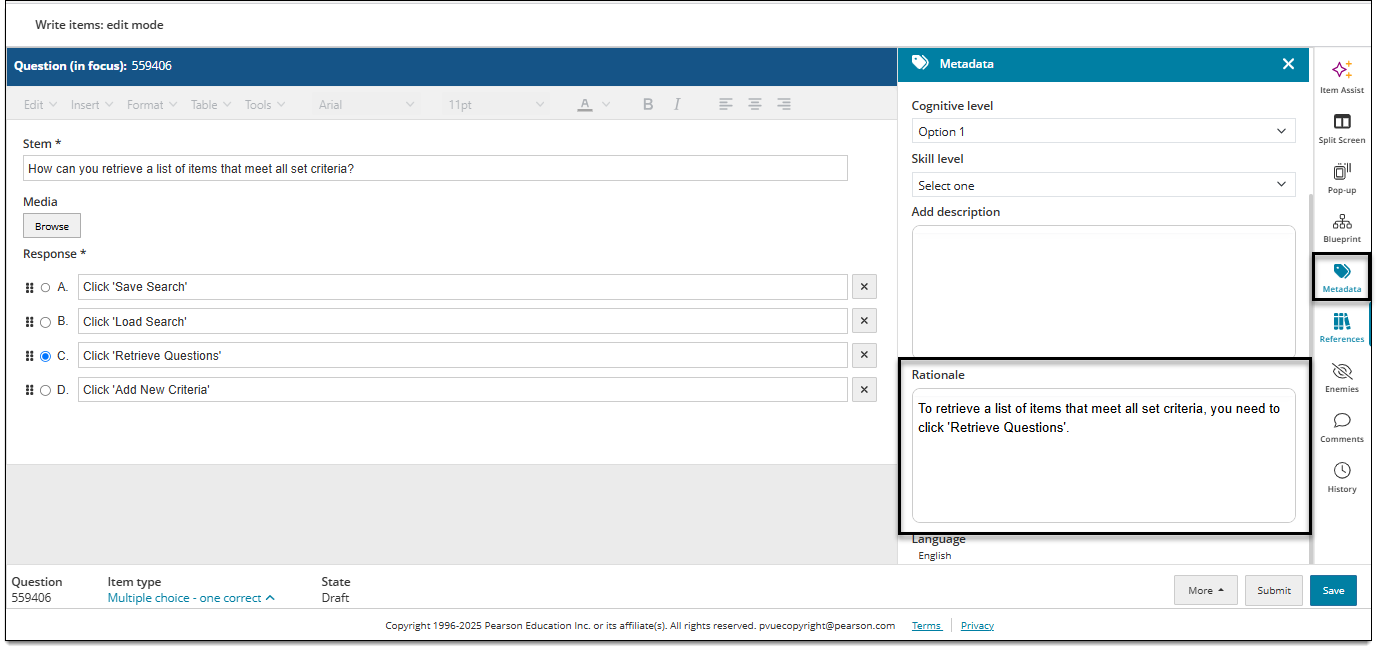
- If a 'Block text' metadata field named "Rationale" is configured for the project, the rationale for the item's answer key will be generated by Item Assist and shown in the Metadata panel. Only one rationale is generated per item. If needed, you can update the rationale text. Only items generated after the Rationale metadata is configured for the project will contain a rationale. It cannot be added to items that were generated before the Rationale metadata was configured.
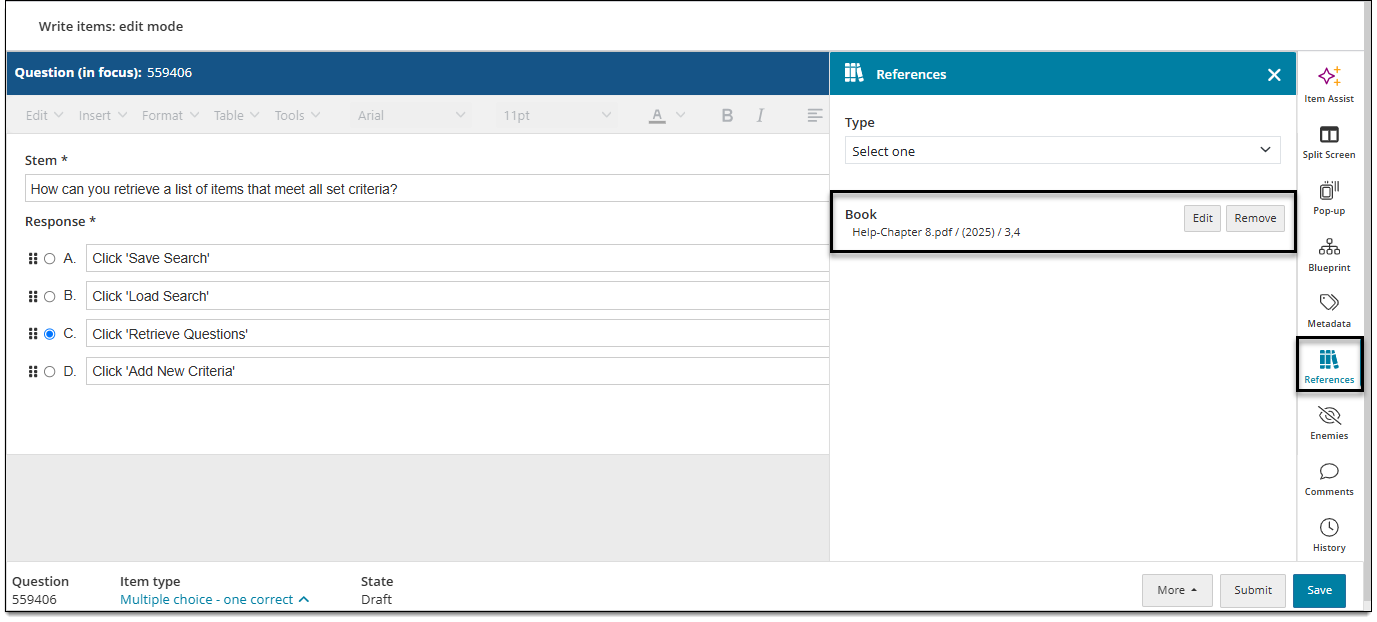
- Specific reference materials used by Item Assist to generate the item content may be shown in the References panel.
- The blueprint you selected before item generation is applied in the Blueprint panel, and the metadata you applied is shown in the Metadata panel. You can change the blueprint or metadata if needed.
- Click Save.
- When you're ready to advance an item, click Submit.
- Submitting an item sends it to the next assigned reviewer or stage in your project workflow. You will no longer be able to edit this item unless it is sent back to you.
- A confirmation is displayed when the item is successfully submitted.