Migrate legacy projects to Authoring
|
|
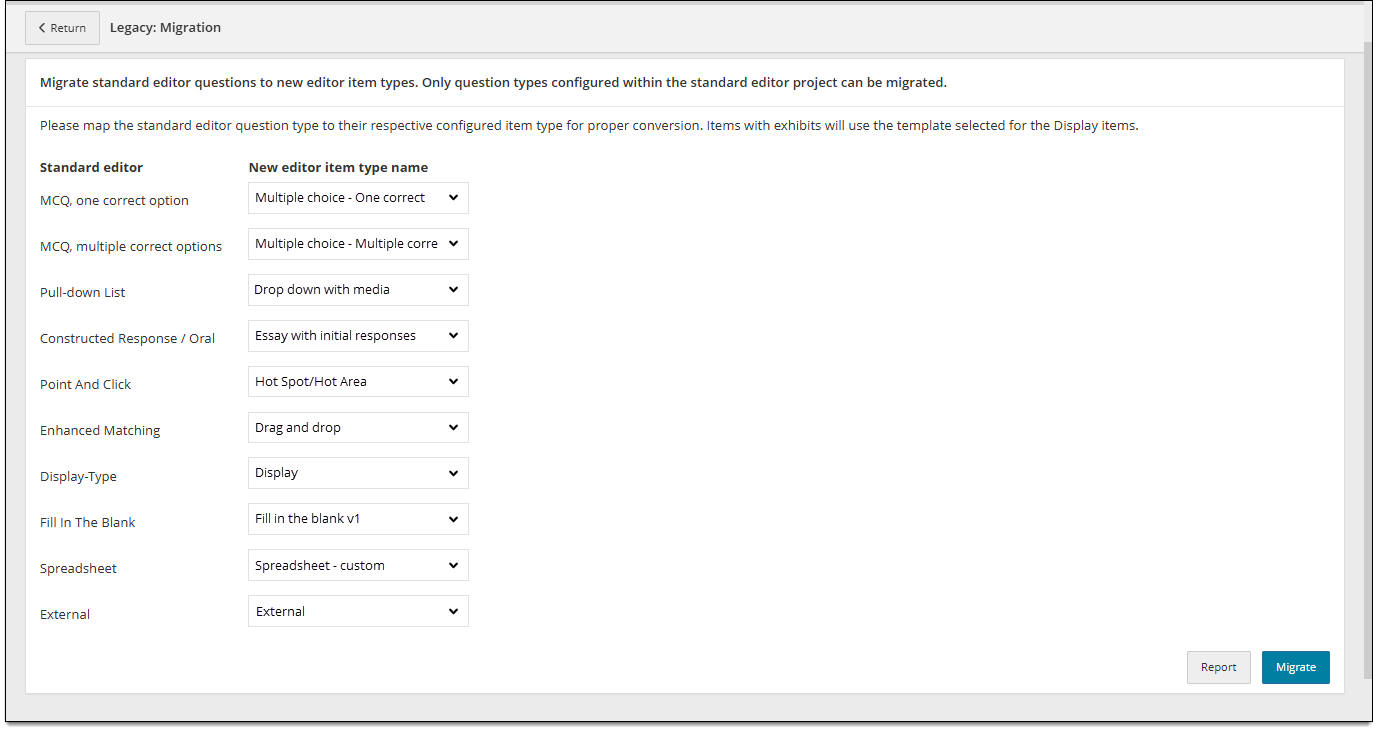
The migration process converts legacy item type templates to a similar/corresponding template in the new Authoring editor. Once you complete migration, the legacy project becomes an Authoring project in which you can only write and edit items in the Authoring editor. Any items that are not migrated will still be available in the project but cannot be opened or edited; they must be moved to another legacy project where you can migrate them later if needed.
|
|
Step 1: Complete migration checklist
Before you migrate, make sure the following conditions are met:
- The legacy project with items to be migrated must be changed to Setup mode. This prevents other users from updating items while they are being migrated.
- If migrating items that contain exhibits, a Display template must be created in the item bank.
- Any new templates to be applied to items with exhibits must be configured to allow the associated exhibit type (split screen, pop-up, or both).
- A corresponding Authoring template must be created on the Manage Item Bank > Configuration > Item Types page for all items to be migrated. (For example, if you are migrating legacy Multiple Choice - One Correct items, make sure a corresponding Multiple choice - One correct template has been created for the item bank.) See below for considerations regarding specific templates.
Template notes
- Essay: The legacy template structure must match the Authoring template structure. For example, if the number or type of content components or essay response boxes don’t match between the legacy and Authoring templates, those items cannot be migrated. In addition, if the legacy template uses custom response identifiers, the Authoring template must have the Customize response identifier on the item setting enabled/set to Yes. Existing custom response IDs on the legacy item will then be carried over to the Authoring template once migrated.
- If you are migrating Matching/Enhanced Matching, Point and Click, and/or Spreadsheet legacy templates, you do not need to create a new Authoring template for each variation before migrating. Instead, you can enable a Set at the item level option in the new Authoring template. The following template settings have this option, and will be required at hte item level once migration is complete (authors must provide a value before they can submit the item):
- (Legacy) Matching/Enhanced Matching > Drag and drop: Scoring rules, Token/Target relationship
- (Legacy) Point and Click > Hot Spot/Hot Area: Response type
- (Legacy) Spreadsheet > Spreadsheet: Spreadsheet Type
 If an imported item doesn't have a value for one of these settings, the import can still complete successfully.
Imported items will carry over these settings from legacy instead of being applied to the Authoring template. For example, if an imported Matching item's scoring rule was previously set to Dichotomous, that scoring rule will be applied to the item(s) once migration is complete — instead of being set to Dichotomous at the template level. (Set at item level will be the configured scoring rule at the template level, but imported items will inherit their original scoring rule at the item level.)
Step 2: Select items to migrate
After you complete the migration checklist, you can begin the migration process.
- Go to Manage > Settings > Migration.
- The Legacy: Migration page is displayed, showing two columns. The left column displays the legacy item types to be migrated. The right column provides a drop-down list of compatible Authoring templates for each legacy template.
- Any legacy item types that are not enabled will not be shown on the page. To enable them, go to Manage > Configuration and click the Questions tab. Next to Allow question types, click to select the types to enable. Then click Update at the bottom of the page.
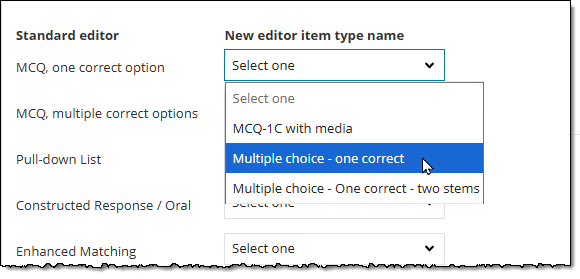
- For each legacy item type to be migrated, select a corresponding Authoring template from the drop-down menu.
Step 3: Run report to check for issues (recommended)
Once you have selected items to be migrated, we recommend running the report to identify specific items that will not be migrated. If you do not wish to run the report now, skip to Step 4 ↓.
- At the bottom of the screen, click Report.
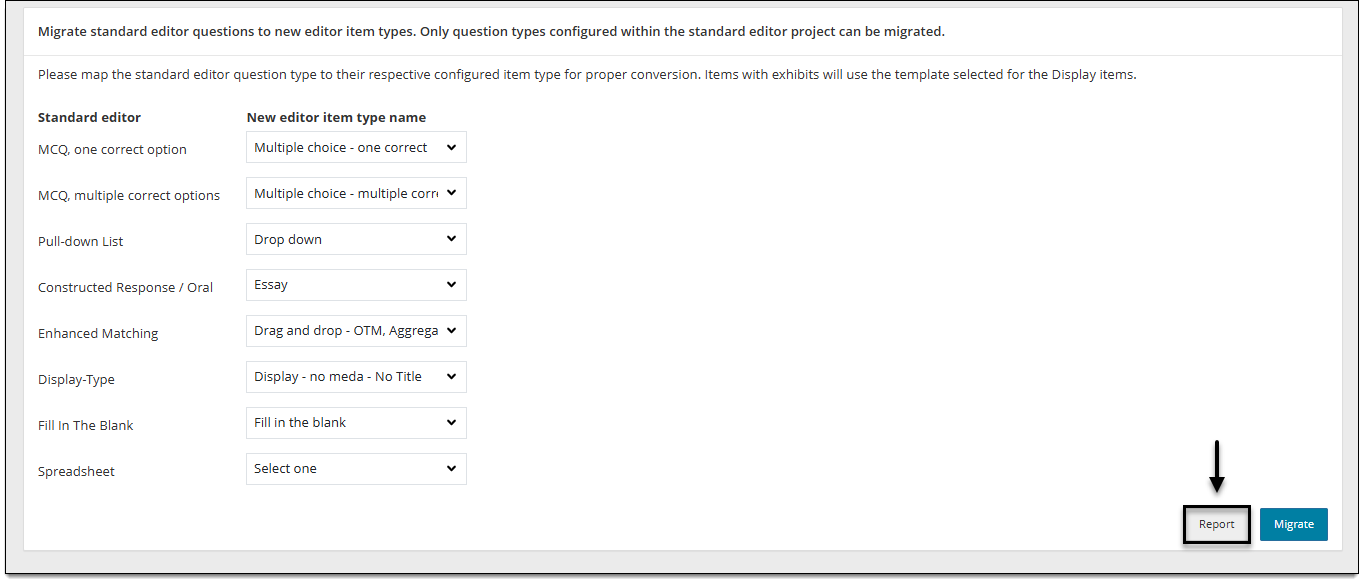
- A link to download the report is displayed at the top of the screen.
- Open the report from your Downloads folder. The file is a CSV with "Legacy_migration" in the file name.
- In the Status column, review items with "Cannot be migrated". The Description column contains information that indicates why items cannot be migrated.
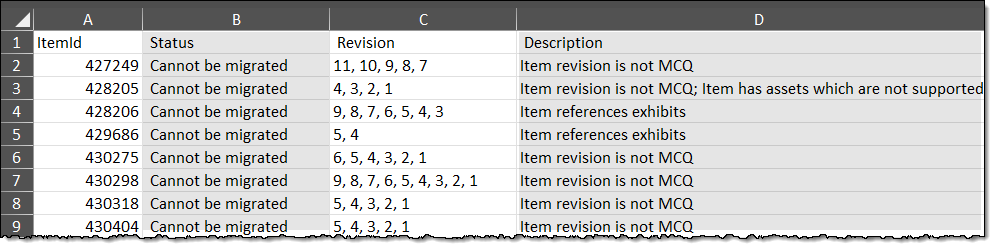
- Take action as needed to correct issues preventing migration. See Common issues impacting migration in the next section below for guidance.
- If no action is needed, proceed to Step 4 ↓ to complete migration.
- If corrective actions were taken, go back to the Migration page and run the report again to verify that issues have been resolved.
Common issues impacting migration
- Item revision is not {item type name}: the item's template was changed for at least one revision; for example, if Revision 5 was changed from MCQ - One Correct (the template being migrated) to MCQ - Multiple Correct, the MCQ - Multiple Correct revisions won't be migrated.
- Item references exhibits: an item references exhibits and a Display template for the new editor (Authoring) is not selected.
- New editor item type does not allow SplitScreen/PopUp exhibit: the Display template to be migrated to does not allow the required exhibit type(s).
- Item has assets that are not supported: the item contains an asset type that is not supported for migration.
- Standard editor item has a mismatch between placeholders and responses: the number of placeholders does not match the number of responses (for fill-in-the-blank items).
Step 4: Migrate items and review summary report
After correcting any issues, you are ready to complete the migration.
- On the Legacy: Migration page (Manage > Settings > Migration), make sure you have selected a corresponding Authoring template for all items to be migrated. (You may need to repeat Step 2 ↑ if you navigated away from this page.)
- Click Migrate at the bottom of the page.
 Once migrated, you will no longer be able to view or edit migrated items in the legacy editor for this project.
- If the items are successfully migrated, a confirmation is displayed at the top of the page and a Complete migration button is displayed at the bottom of the page.
- If issues are encountered, the process won't finish and an error report is provided. Download the error report to determine what changes need to be made (such as removing item types that can't be migrated or selecting different templates) before attempting to migrate again.
- When ready, click Complete migration at the bottom of the page.
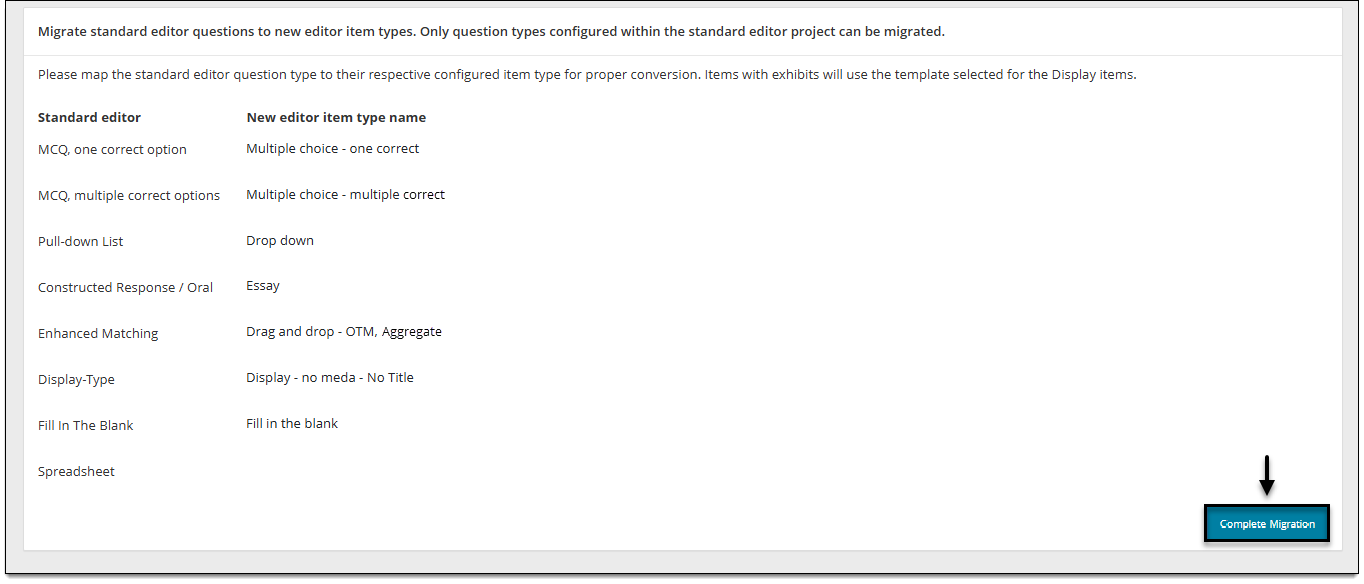
- In the confirmation pop-up, click Yes.
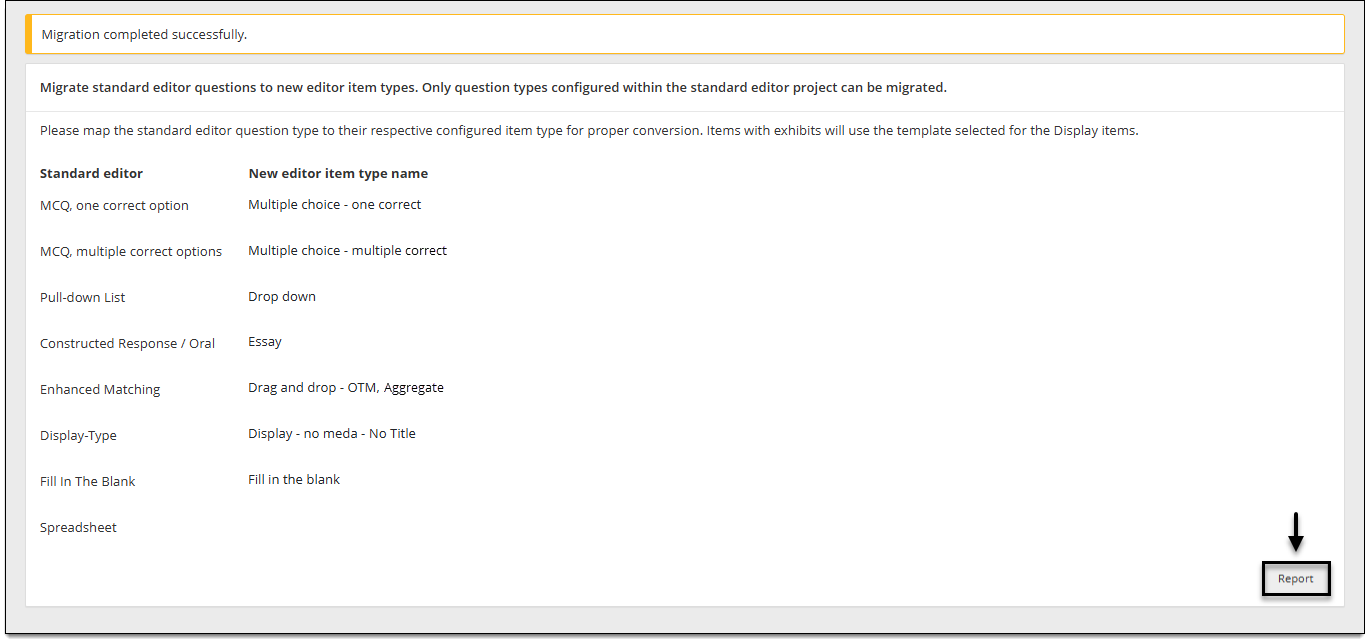
- Once complete without errors, "Migration completed successfully" is displayed at the top of the page.
- At the bottom of the page, click Report. This provides a summary of items that were migrated to new templates as well as items that were not migrated. You must download this report immediately before navigating away from the page; you cannot retrieve the report again.
Step 5: Follow-up actions
Complete follow-up actions as needed, such as:
- Change the project back from Setup mode to Active.
- Review migrated items for any post-migration discrepancies.
- Go to Manage > Manage item types to enable the new templates and choose the default template for the project.