Import QTI items
|
This page is launched from the following path in ExamDeveloper: Manage > Import > Questions. |
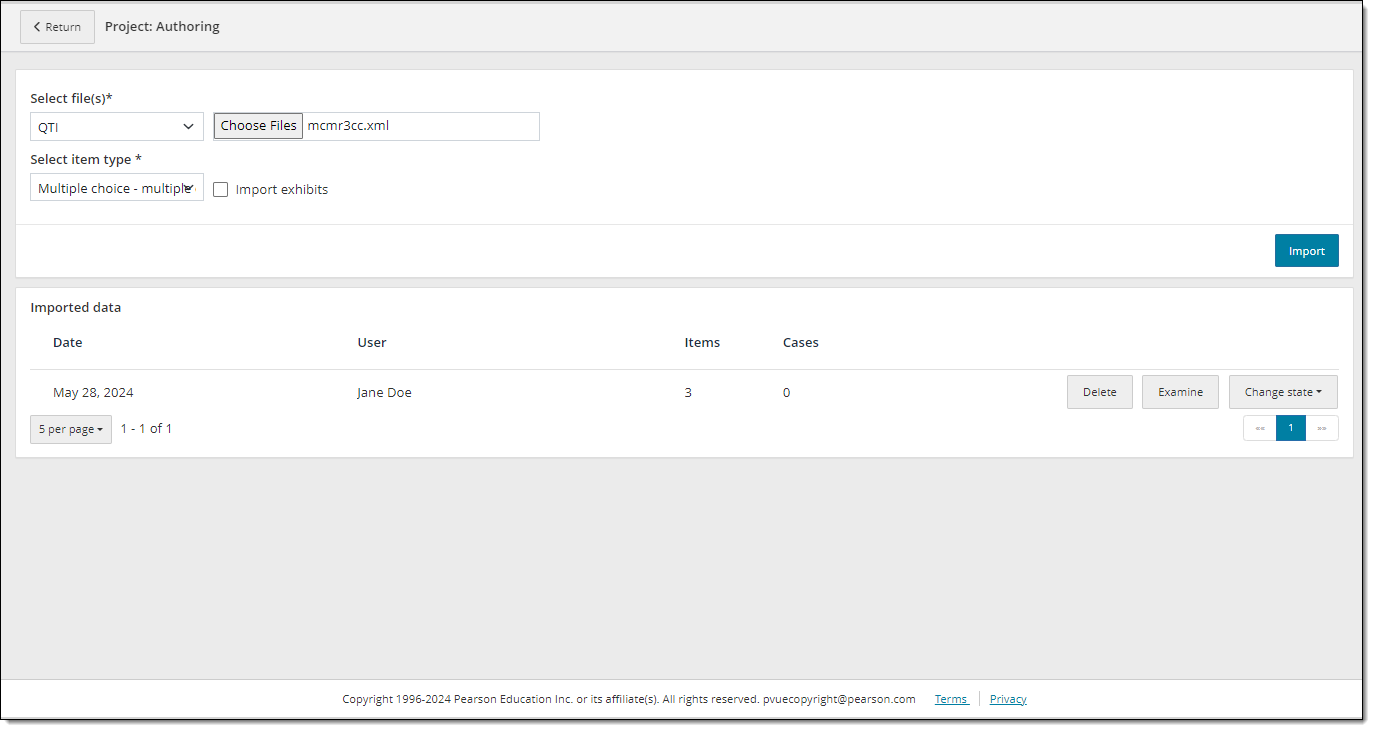
Project managers can import QTI items/questions for use in the Authoring application by uploading an itempool.xml file and selecting a compatible item type template to apply to the imported items. Once imported, items must be reviewed and approved to move on to the next stage in the item development process.
Prepare QTI items for import
Before importing QTI items, review the following points and make adjustments to the item type templates or itempool.xml as needed:
- All items in a single item pool must be the same item type and compatible with the same item type template.
- The number of content components in the imported item stem cannot exceed the number of content components in the item type template to be applied. For example, if the item type template has two content components, the imported item cannot have more than two content components, but it could have only one content component at the time of import.
- Content component types in the item should match the content component types in the template and be in the same order. For example, if the imported item has Component 1 as Text, Component 2 as Media, and Component 3 as Text, the item type template should also have the same configurations (Component 1 as Text, Component 2 as Media, and Component 3 as Text). In some cases import can still occur if there is a mismatch related to media components, but it is best practice to make sure both type and order of content components match between the imported item and the template.
- The maximum number of options in the item type template must meet or exceed the maximum number of options for any item to be imported. For example, if some of the imported items have five response options, the item type template must allow at least five options.
- Assets and media should be uploaded into ExamDeveloper before importing any items that contain them. If this is not done first, the item could be imported without the asset (an "asset not found" error will occur). Assets in the XML can be contained within a <matimage> or<img src> tag. (Either format will be converted to img src in JSON format.)
- Only the item content, answer key, font styles, tables, and links to asset locations are imported from an item pool XML. All other configurations (such as media settings and scoring rules) will be set according to the current item type template configuration in the Management application. You can modify the template configurations as needed once the items are imported and approved. Or, create new item type templates as needed before importing the itempool XML.
- Exhibits must be in the same itempool as the items that contain them. In addition, a Display item template with the same or greater number of content components must exist before the exhibit can be uploaded.
- External items (Audio capture, Audio capture with video and Selectable text) must be in a compressed zip folder that does not contain subfolders. The zipped folder must include an itempool.xml and all relevant JSON files.
- The XML file must be named "itempool.xml". Any variations of this name will result in an "itempool not found" error.
-
The XML file must contain </questestinterop> at the bottom of the XML file, and/or after each </item>.
-
XML files encoded as UTF-8 BOM should be saved to a new file as UTF-8. Only UTF-8 (without BOM) will be accepted.
Prepare QTI items with equations for import
 We recommend using MathML format when importing items with equations instead of importing equations as assets.
- If equations are imported as assets, they must also be uploaded to the project as assets and will be treated as such (similar to a JPG image or PDF file). This means that authors and reviewers will not be able to modify or update the equation content.
- If equations are imported as assets but the assets have not been uploaded to the project, an "Asset not found" error will occur and the item will either fail to import or import without the equation.
Example showing MathML (recommended format):
<material>
<mattext><p>What is the <m:math><m:msqrt><m:mn>2</m:mn></m:msqrt></m:math>?</p>
</mattext>
</material>
Example showing equations attached as an asset (not recommended):
<material>
<mattext><p>What is the <img src='sampleimage.svg' alt='square root of 2' /></p>
</mattext>
</material>
Import QTI items
- In ExamDeveloper, go to Manage > Import > Questions.
- Under Select file(s), click the drop-down menu and select QTI.
- Click the Choose Files button and navigate to the desired XML item pool files on your computer.
- To select multiple files, hold down Shift or Ctrl on your keyboard while selecting files. All of the files must use the same item type template (only one item type template may be used during each import).
- To select multiple files, hold down Shift or Ctrl on your keyboard while selecting files.
- Under Select item type, click the drop-down menu and select the applicable item type template. (Note: only item type templates that are enabled for the project will be shown in this drop-down menu.)
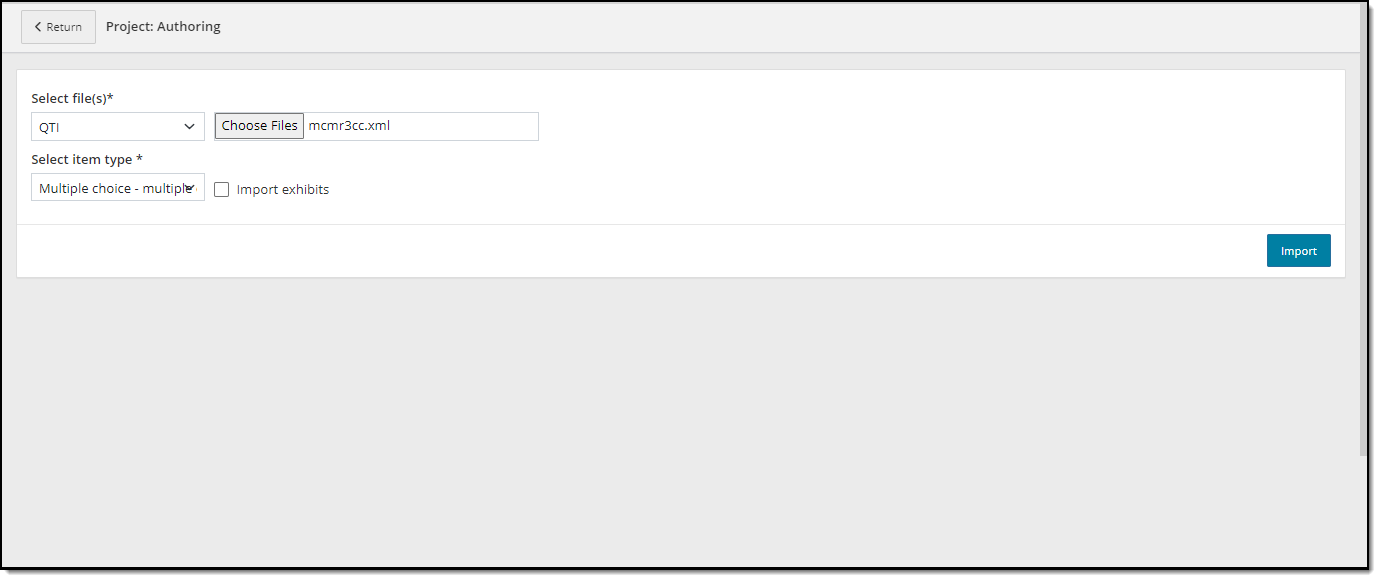
- (Optional) If items contain exhibits, select the Import exhibits checkbox and choose an exhibit template from the Select exhibit item type drop-down menu.
-
Exhibits must be compatible with an existing Display item type template. The exhibit content must also be included in the same item pool as the items that contain it.
-
- Click Import.
- If successful, a confirmation message is displayed at the top of the screen.
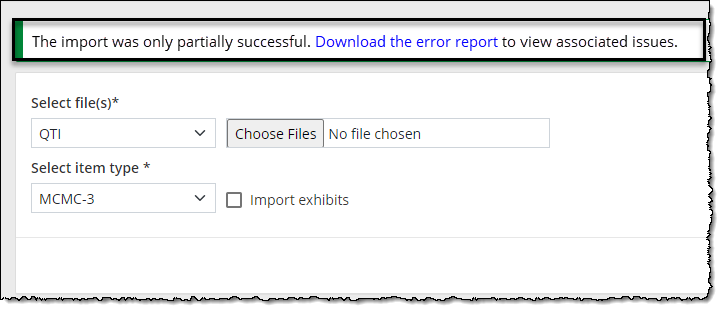
- If errors occur but items are still imported, the message shown at the top of the screen will include a link to download an error report and review the details. Refer to Review QTI import errors below for more details.
- If errors occur and items are NOT imported, you may need to make adjustments to the itempool.xml or the item type template. Review Prepare QTI items for import above for tips.
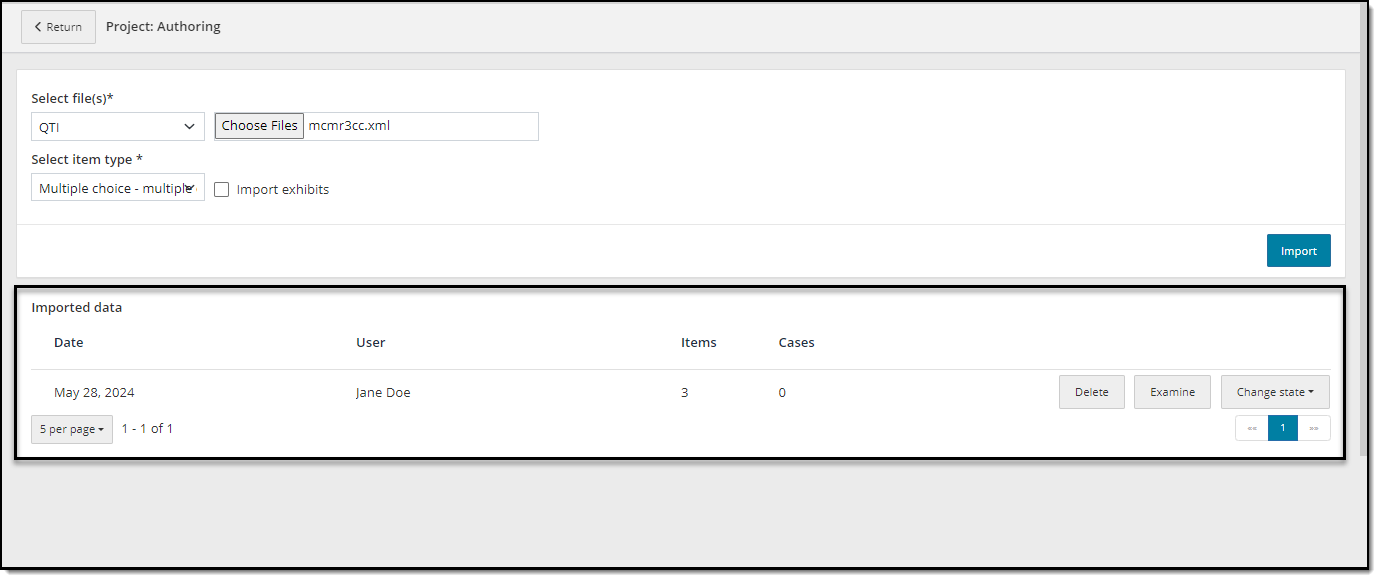
- An Imported data section should now be visible in the lower half of the screen. You will see the number of items imported each day along with the option to delete, examine, or change the status of each imported item. If/once all items imported on a given day are accepted or have their status changed out of "imported", they will no longer show in this list.
Review QTI import errors
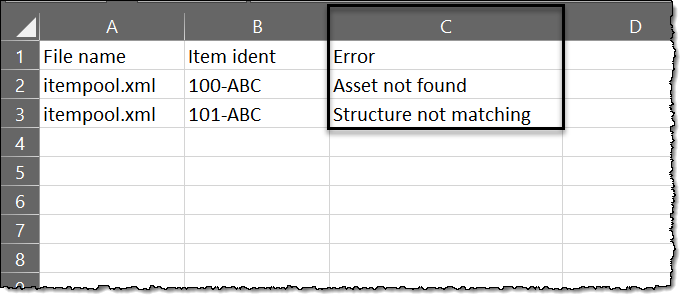
If errors occur during import, a message at the top of the screen will include a link to download a CSV error report and review the details.
The CSV will contain an Error column for each item. Common errors include:
- Asset not found: e.g., an image was referenced in the item but was not uploaded to the Assets page in ExamDeveloper, the path to an image is incorrect, items with equations were stored as assets but the equations were not uploaded as assets in the project (MathML is the recommended format for equations)
- Structure not matching: e.g., a MCQ question has two Text content components, but the MCQ template that was applied only has one Text content component
Examine and approve imported items
Once an item is imported, you must examine it in the Authoring application to review the content, formatting, and other elements such as images, exhibits, or media.
- In the Imported data section, find the item in the list and click Examine.
- The item will launch in the Authoring application with a status of Imported. Note: item Idents in the XML will be imported as an External ID within ExamDeveloper.
- Review the content as needed. You can also click More > Preview in the lower-right corner to view the item using Pearson VUE's sample test driver.
- Click Return in the upper-left corner to return to ExamDeveloper.
- Click the Questions tab to return to the import page.
- Find the item you just examined under Imported data and click Change state. Then choose an option based on your review of the item:
- Returned: select if you wish to move the item to a "returned" state which will allow the item to be assigned to a user for review.
- Review*: select the appropriate review status to assign the item for manual review by an SME or designated reviewer. *Review statuses vary by organization.
- Validate: select if your organization utilizes validation during the item development process and the item is ready for this stage.
- Completed: select if the item is ready to be added to an exam form.
- Obsolete: select if you don't intend to use the item at this time but still want to be able to search for it in the item bank.
Delete imported items
If you imported an item by mistake or need to upload a different version due to errors, you can delete it after import.
- In the Imported data section, find the item in the list and click Delete.
- Review the confirmation and click Yes to proceed.
- All imported data for the item will be removed from ExamDeveloper.