Audio capture (item type template)

This page describes the configurations for the Audio capture  item type template. 

Note If new options have been added to this template since you last updated it, a notification is displayed to authors indicating that the template has not been updated. This notification will be displayed in Authoring until you enable or disable any new options and save the changes. 

Authoring tab

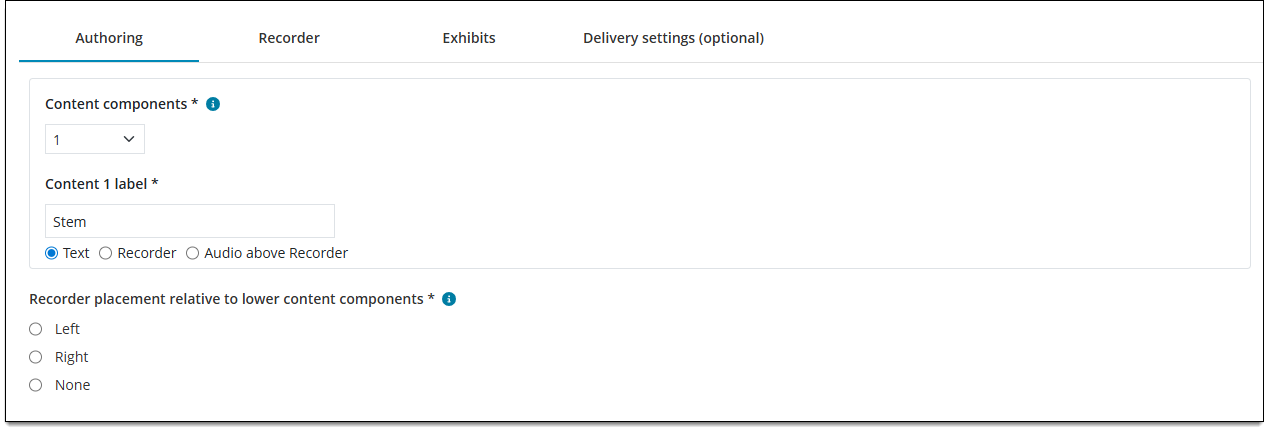
Specify the number and type of Content components and recorder placement.
Field

Description

Content components

The number of Content components enabled for the item type. A 'Content component' is a distinct area containing either text and images (such as the question or stem) or audio files. 

  • Note Only audio files (such as MP3) can be added to Media components in Audio capture templates. 
  • Note Response options are not part of Content components. 
  • Note The order of Content components in the template is the order in which they will display to candidates.
  • Note Authors are required to add content to Text components, but are only required to add audio content to Audio above recorder components if the validation is enabled on the Media tab ↓. Validations are enforced upon submit, not save. 
Content label

The Content component label and the type of content to be provided (text or media). The Content label acts as a header for the content section so the author knows what content to add (such as "Introduction", "Question", "Audio" "Recorder", etc.).  

  • Note The type indicates what type of content is allowed for that component. Text components can include text or images. Recorder components include an audio recorder for the candidate to record a response. Audio above recorder allows an audio sample in addition to the recorder to provide an audio file that candidates must listen to.
  • Note Only one recorder component can be used per template. You must choose either Recorder or Audio above recorder; you cannot have both or add tow instances of the same recorder type.  
  • Note This Content label is not shown to candidates during test delivery. 
Recorder placement relative to lower content components 

If desired, you can align the recorder to the left or right of any content components that are lower than the recorder component. For example, if you have a Recorder component and a text component named "Question" below it, you can align the recorder to the left or right of the "Question". 

  • Left: the recorder is aligned to the left of any text components that are added below the recorder.  
  • Right: the recorder is aligned to the right of any text components that are added below the recorder.  
  • None: the recorder is aligned in the center of the page (still above any text components that are added below the recorder). 

Recorder tab

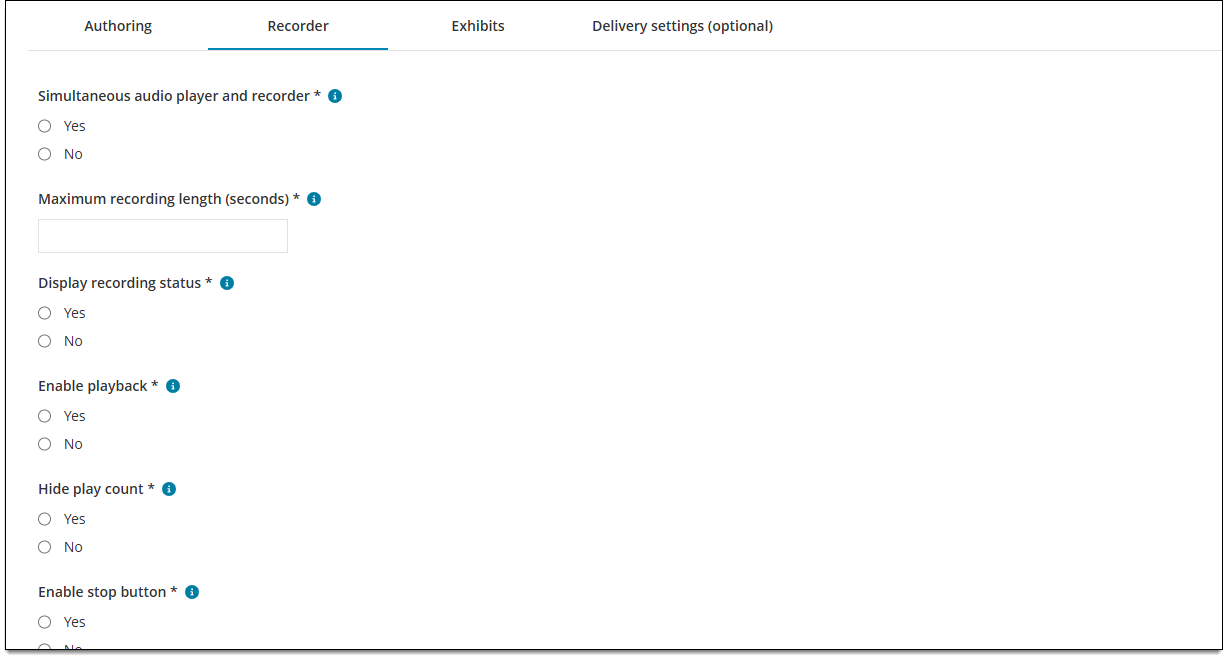
Specify settings for the audio recorder. 
Field

Description

Simultaneous audio player and recorder

Determines if the audio player and recorder are auto-played simultaneously. 

  • Yes: Simultaneous auto-play is enabled.
  • No:  Simultaneous auto-play is enabled.
Maximum recording length (seconds)

The maximum number of seconds allowed for a candidate's recorded response. For example, to limit the recording length to one minute/60 seconds, you would input 60.

Display recording status

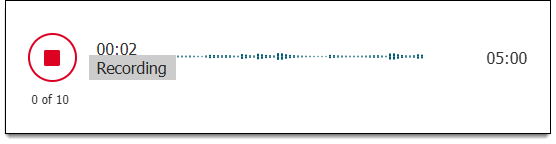
Determines if status indicators such as "Ready", "Recording", "Paused" and "Recording in X seconds" are shown to the candidate while they are recording their response.  

  • Yes: Status indicators are displayed to candidates during recording. 
  • No: Status indicators are not displayed to candidates during recording. 

Enable playback 

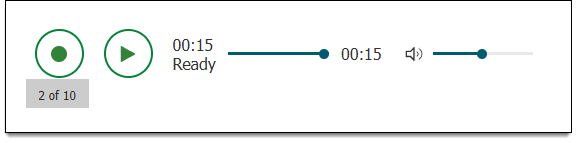
Determines if candidates can plat back their last recorded attempt. 

  • Yes: Candidates can listen to their recording/play it back. 
  • No: Candidates cannot  listen to their recording/play it back. 
Hide play count 

Determines if candidates can see how many recordings attempts they have used. The count is displayed below the record button. For example, "2 of 10" means the candidate has recorded two attempts of 10 allowed attempts, so 8 attempts remain. 

  • Yes: Candidates see the play count below the record button.
  • No: Candidates do not see the play count below the record button.

Enable stop button

Determines if the candidate can stop the recording when they choose to. If no stop button is present, they must record for the duration set as the Maximum recording length ↑.

  • Yes: A stop button is available on the audio recorder. 
  • No: A stop button is not available on the audio recorder. 
Enable auto record, Specify delay start

Enable auto record determines if the recorder is set to automatically begin recording after a specified delay period. 

  • Yes: The recorder will automatically begin recording, either after the item loads or after the audio is played if audio is included. If Simultaneous audio player and recorder ↑ is set to Yes, the recorder will automatically begin recording when the audio begins playing. 
  • No: The recorder will not begin recording until the candidate clicks the record button. 

Specify delay start: Enter a number to specify how many seconds should be counted down before the automatic recording begins. 

Note If Audio above recorder is the content type, audio files that are included for candidates to listen to (separate from their recorded response) will have their own settings on the Media tab ↓.

Maximum recording attempts

The maximum number of times that a candidate can attempt a recording, in seconds. For example, enter "20" to allow the candidate to attempt a recorded response 20 times. 

Exhibits tab

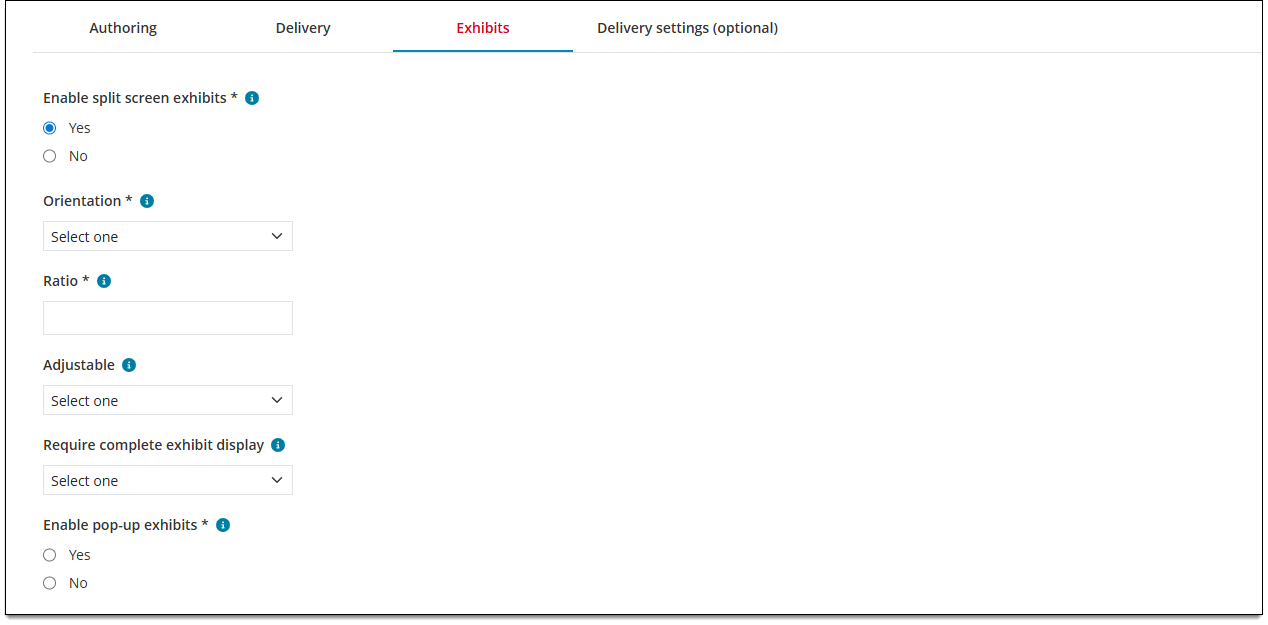
Enable or disable the ability to add split screen exhibits to the item.
Field

Description

Enable split screen exhibits

Enables or disables the ability for authors to add split screen exhibits to the item.

  • Yes allows authors to add split screen exhibits to the item. 
  • No disables split screen exhibits. 
Orientation

Determines where exhibits are displayed on the screen during test delivery in relation to other item content by default*. For example, "Left" places exhibit content on the left side of the screen and question/response content on the right side.

Note Exhibits will always show on the left side of the screen when authoring the item. Orientation sets exhibit placement only for test delivery, or what the candidate will see. However, each orientation option can be viewed by authors using the Preview option. 

Note Authors can change this setting at the item level in the Authoring application.

Ratio

Determines how much screen space the exhibit will occupy (i.e., the ratio of exhibit content to other item content in terms of screen space). You must enter a value between 0 and 1 up to one decimal place (e.g., "0.5" not "0.55") or use the arrows to set the default* ratio. 

For example, "0.4" sets the exhibit content to occupy 40% of the screen and all other content to occupy 60%. 

Note Authors can change this setting at the item level in the Authoring application.

Adjustable

Determines if the candidate can click and drag to adjust the size of the split screen exhibit (the amount of space occupied by the exhibit versus the item content). 

  • True: Candidates can adjust the size of the split-screen exhibit display. 
  • False: Candidates cannot adjust the size of the split-screen exhibit display. 
Require complete exhibit display

Determines if the candidate is required to view the entire contents of the exhibit before proceeding to the next item. 

  • True: Candidates must view all contents of the exhibit (including any required scrolling) in order to proceed to the next item. 
  • False: Candidates are not required to view all contents of the exhibit (including any required scrolling) in order to proceed to the next item. 


Media tab

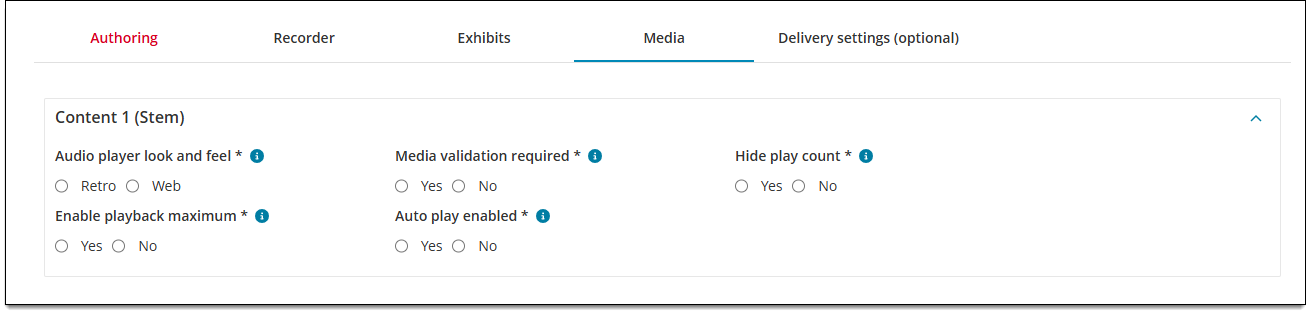
Specify audio player settings if an audio file is added to the item in addition to the recorder.

Note This tab is shown only when Audio above recorder is selected as the Content component type ↑.  
Field

Description

Audio player look and feel

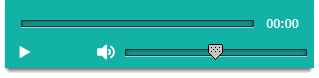
Determines which type of audio player is presented for audio samples (if an audio sample is added to the item). 

  • Retro
  • Web
Media validation required

Determines whether or not authors are required to add an audio sample file before they can submit the item. 

  • Yes: Authors are required to add an audio file before submitting the item. The item can still be saved without adding a media file. 
  • No: Authors are not required to add an audio file before submitting the item. 
Hide play count

Determines if candidates can see how many times they have played the audio sample (not their own recordings). For example, "2 of 10" means the candidate has played the audio sample two times out of ten allowed, so only eight plays remain. 

  • Yes: Candidates see the play count for the audio sample.
  • No: Candidates do not see the play count for the audio sample. 
Enable playback maximum

Allows you to set a limit on the number of times an audio sample can be played by the candidate during test delivery.

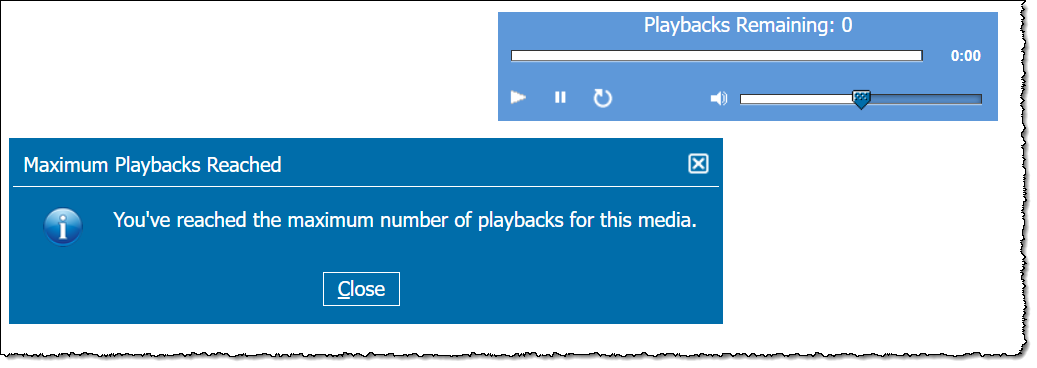
  • Yes: enforces a limit on the number of times the audio sample can be played. You must also enter a number in the Number of times playback is allowed. The number of remaining playbacks is shown on the media player, and a pop-up message is displayed if the candidate reaches the maximum number of playbacks. See exampleSee example


  • No: the media can be played an unlimited number of times and no playback maximum is displayed on the media player. 
Number of times playback is allowed 

The maximum number of times the media can be played. For example, if "5" is entered candidates can only play the audio sample five times total during test delivery.  

Note This configuration is only shown if Yes is selected for Enable playback maximum ↑.

Auto play enabled

Enables or disables auto play. 

  • If Yes, the audio sample starts playing once the item is displayed.
  • If No, the Play button must be clicked for the audio sample to begin playing. 
Seconds

Enter the number of seconds that should pass before the audio sample is automatically played. Countdown starts from the time the item is displayed or navigated to during test delivery. 

Note This configuration is only shown if Yes is selected for Auto play enabled ↑.

Delivery settings tab (optional) 

Choose default settings for item and response attributes that are used or displayed during exam delivery, such as shuffled responses, response confirmations, and calculators. 
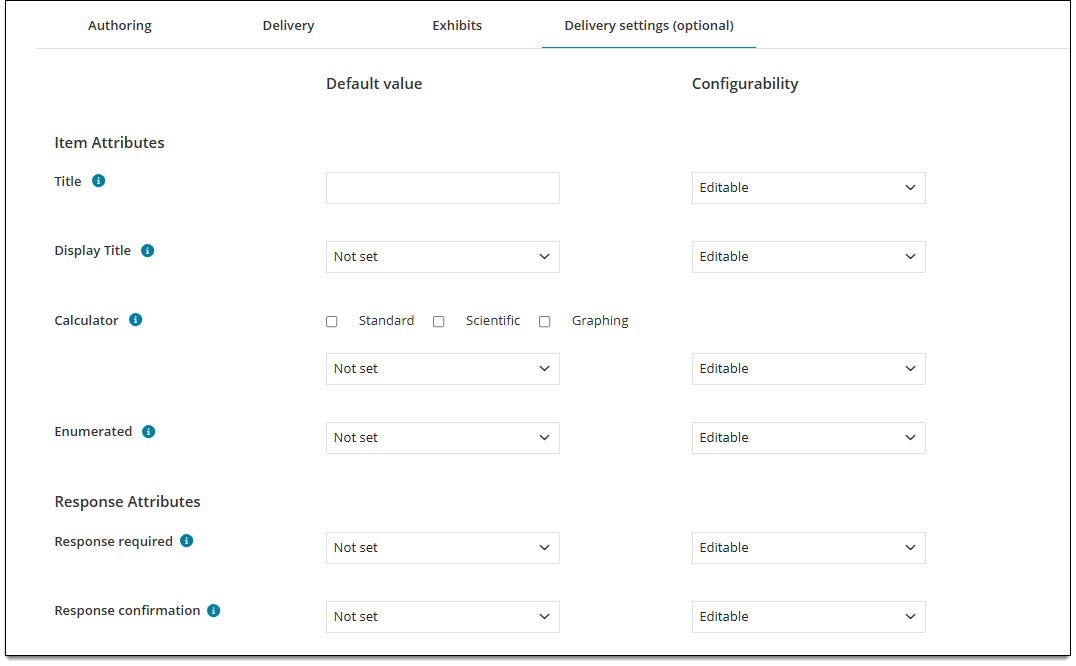
Item attributes

Note Any field with a Configurability set as Select one will be hidden from writers and reviewers at the item level. (Project Managers will always see it.)

Field

Description

Title

Default value

  • Enter a default item title. The title will display on the item review screen during exam delivery if idents are hidden and Display title (see below) is set to True. 

Configurability 

  • Editable: Authors can change the title for an item. 
  • Viewable: The title will display grayed out so that writers and reviewers can see it, but not change it. (Project managers can still override in Authoring.)
  • Select one: The field will be hidden from writers and reviewers at the item level. (Project Managers will always see it.)
Display title

Default value

  • Select True to display the item's title during exam delivery, or False to hide it during exam delivery (only ExamDeveloper users can see the title). The title will display on the item review screen during exam delivery if idents are hidden and a Title has been added (see above).
  • If you select Not set, no QTI values for this setting will be exported.

Configurability 

  • Editable: Authors can change the True or False selection. 
  • Viewable: The field will be grayed out so that writers and reviewers can see what the current setting is, but they cannot change it. (Project managers can still override in Authoring.)
  • Select one: The field will be hidden from writers and reviewers at the item level. (Project Managers will always see it.)
Calculator

Default value

  • Select Standard, Scientific, and/or Graphing. The options you select determine which calculator types and combinations are available for the author to select and apply to the item. 
  • If you select a calculator type or combination of types from the drop-down menu, that option you select will be selected by default for all items using this template. Authors and reviewers can still change it (if Configurability is set to Editable). If you choose Not set, no calculator types are selected by default and the author/reviewer will choose a type .

Configurability 

  • Editable: Authors can change the calculator type. 
  • Viewable: The field will be grayed out so that writers and reviewers can see which calculator is used but cannot change it. (Project managers can still override in Authoring.)
  • Select one: The field will be hidden from writers and reviewers at the item level. (Project Managers will always see it.)
Enumerated 

Default value

  • Select False to exclude items using this template from the numbering sequence in the review screen, or select True to include them. If you select Not set, no QTI values for this setting will be exported. About enumerationAbout enumeration

    By default, all items are numbered in the review screen. When you exclude an item from numbering, the next item in the list uses the subsequent numbering. For example, if the first item is excluded from the numbering; the second item is assigned the value of 1. If the fifth item is also excluded from the numbering, the sixth item is assigned the number 4.

Configurability 

  • Editable: Authors can change the True or False selection. 
  • Viewable: The field will be grayed out so that writers and reviewers can see what the current setting is, but they cannot change it. (Project managers can still override in Authoring.)
  • Select one: The field will be hidden from writers and reviewers at the item level. (Project Managers will always see it.)

Response attributes

Field

Description

Shuffle response 

Default value

Determines if the 'shuffle response' feature is enabled for this item.

  • Select Yes to enable shuffled responses (response options will be displayed in a random order) or No to disable shuffled responses (response options will always be displayed to candidates in the same order - which is the order displayed in the item editor). If you select Not set, no QTI values for this setting will be exported. 
  • Note For Grid multiple choice - one correct and Grid multiple choice - multiple correct templates, this field will always be set and exported as "No" and cannot be changed in ExamDeveloper.

Configurability 

  • Editable: Authors can change the True or False selection. 
  • Viewable: The field will be grayed out so that writers and reviewers can see what the current setting is, but they cannot change it. (Project managers can still override in Authoring.)
  • Select one: If you select Not set, no QTI values for this setting will be exported. 
Response required

Default value

Determines if the candidate must enter a complete response for the item before navigating away from it.

  • Select True to require a response (a message is displayed if the response is incomplete or unanswered and the candidate is unable to proceed until a response is entered) or False to allow candidates to proceed without answering the item completely. If you select Not set, no QTI values for this setting will be exported. 

Configurability 

  • Editable: Authors can change the True or False selection. 
  • Viewable: The field will be grayed out so that writers and reviewers can see what the current setting is, but they cannot change it. (Project managers can still override in Authoring.)
  • Select one: The field will be hidden from writers and reviewers at the item level. (Project Managers will always see it.)
Response confirmation

Default value

Determines if candidates will be prompted to confirm their answer to an item before navigating away from it. This is often used for exams that don't allow candidates to go back to an item once it has been answered.  

  • Select True to enforce the confirmation prompt or select False to disable the prompt and allow candidates to proceed without confirming. If you select Not set, no QTI values for this setting will be exported. 

Configurability 

  • Editable: Authors can change the True or False selection. 
  • Viewable: The field will be grayed out so that writers and reviewers can see what the current setting is, but they cannot change it. (Project managers can still override in Authoring.)
  • Select one: The field will be hidden from writers and reviewers at the item level. (Project Managers will always see it.) 
No response confirmation

Default value

Determines if the candidate must enter a complete response for the item before navigating away from it. 

  • Select True to require a response (a message is displayed if the response is incomplete or unanswered and the candidate is unable to proceed until the response is complete) or select False to allow candidates to proceed without answering the item completely. If you select Not set, no QTI values for this setting will be exported. 

Configurability 

  • Editable: Authors can change the True or False selection. 
  • Viewable: The field will be grayed out so that writers and reviewers can see what the current setting is, but they cannot change it. (Project managers can still override in Authoring.)
  • Select one: The field will be hidden from writers and reviewers at the item level. (Project Managers will always see it.)